
USB Sound Card
I have a Uniden SDS200 which has an ethernet jack and it is a breeze to set the scanner up as a server over my network using the excellent software, Proscan. That includes streaming the audio across the network.
My SDS100 is a slightly different animal and it requires a a physical connection via USB so that Proscan software can see the scanner. That won’t carry your audio though, so it needs a separate physical connection from the Line Out (headphone jack) on the SDS100 to the controlling computer.
I don’t know about your laptop or computer but mine DOES NOT have an input jack for a microphone. So what you have to do is add a USB sound device that has a separate microphone input.
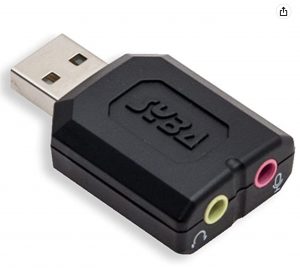
The one I have and can confirm that it works is the Syba External USB Stereo Sound Adapter. It works perfectly but there is one downside. It’s fat. If you have two USB ports together it partially blocks the one next to it. You’d have to get a USB extension to use two side by side ports. There seem to be no shortage of various kinds of USB sound cards on Amazon that aren’t as large or aren’t just a dongle. I ordered this one but haven’t received and tested it yet. The link comes with a 3′ cable as well. You can buy just the card cheaper if you already have a 3.5mm to 3.5mm cable.
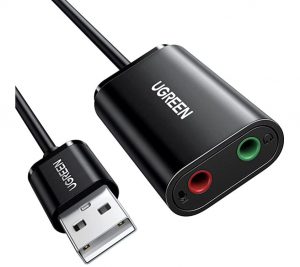
UGreen Sound Card
That should let me use my side by side ports. Now let’s set up the SDS100 to the computer and configure Proscan. Essentially you just plug the scanner into the computer via USB and get Proscan going. Then connect the 3.5mm to 3.5mm cable from the SDS100 headphone jack to the red microphone port on the USB sound card.
SDS100 as ProScan Server (click pics to enlarge)


Since you have plugged in your USB sound card and the SDS100 headphone jack is plugged into the mic input make sure your default microphone device in Windows is the USB Sound card.
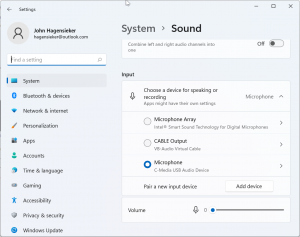
Microphone Input
Now click on the Remote Scanner Over IP tab in Proscan and fill out your server details. Be sure to put a password in so you can have full control on the Client side. I used a local IP address (the address of the laptop) and I’m only doing this INSIDE my local network. Everything else is self explanatory. Then start the server.
Proscan ROIP Server Side (click pic to enlarge)

Now you may or may not want audio to stream from the server. I set mine up to work but then just turned the volume down. On the Audio Control Tab select the Monitor and Test tab and set the Capture Audio Service to Recorder and click the Loopback box.
Proscan Server Audio (click pic to enlarge)
")
That should do it for the Server side. Now let’s head to the Client side. On the Remote Scanner Over IP tab make sure you select Client, the same port as what is on the Server side (I changed both of mine from 5000 to 5001) and add in your password. Hit Start. It should connect to your Proscan server.
Connected to Proscan Server (click pic to enlarge)
")
Now go to the Audio Control tab on the client computer and for Capture Audio Service select Remote Scanner Over IP. Then make sure that the Loopback button is unselected.
Client Audio Proscan (click pic to enlarge)
")
At this point you should be connected to your server on your client, seeing your scan results AND STREAMING AUDIO! Now you can have a scanner with you in any room in your house.