This is another one of those things………..All the information is out there. Several good sources have blogged about it, but NO ONE has put it in a Dummies Guide for the rest of us to follow.
NVME support and NVME booting is now built in to Raspberry Pi OS. If you have a Compute Module Lite you can use the SD Card Copier program to copy your SD card to your NVME drive and boot to the NVME by removing the SD card, however if you have a Raspberry Pi 4 Compute Module with eMMC you have to change the Boot Order according to the docs.
NOTE: THIS IS SPECIFIC TO THE COMPUTE MODULE 4. THERE IS AN EASIER WAY TO CHANGE THE BOOT ORDER WITH A REGULAR RASPBERRY PI IN PI OS. DON’T GET THE METHODS CONFUSED.
It’s not hard to do this. And even if you use an SD card it might shave a little time off the boot to not have it looking for other boot sources first. I recommend doing the following steps anyway so the NVME drive is first in the boot order.
First and foremost I will assume you have a booting Raspberry Pi CM4:
- Raspberry Pi CM4 either with eMMC booting or via SD Card. (This example will be from SD) I have an 8GB with no WiFi or Bluetooth.
- NVME PCIe Adapter – This one works fine.
- SSD NVME – Bang for the buck I recommend the Samsung EVO 970 Plus I’ll be using the 2TB version of this card.
- A micro USB to USB cable.
- Power supply of 12 volts and probably a minimum of 2 amps. I am using an old router brick that is 12v. 1.5 amps with no issues so far. I do recommend around 20 watts of power for the board, adapter board, and SSD.
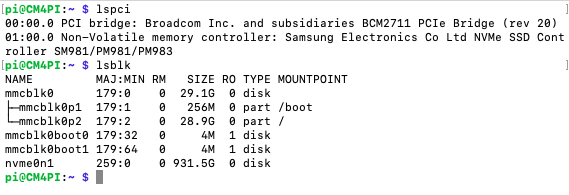
Once booted up normally with the adapter and nvme drive connected let’s check to see if it is recognized with these two commands:
lspci
lsblk
lspci and lsblk results (click pic to enlarge)
You can see the nvme drive is detected. Good!
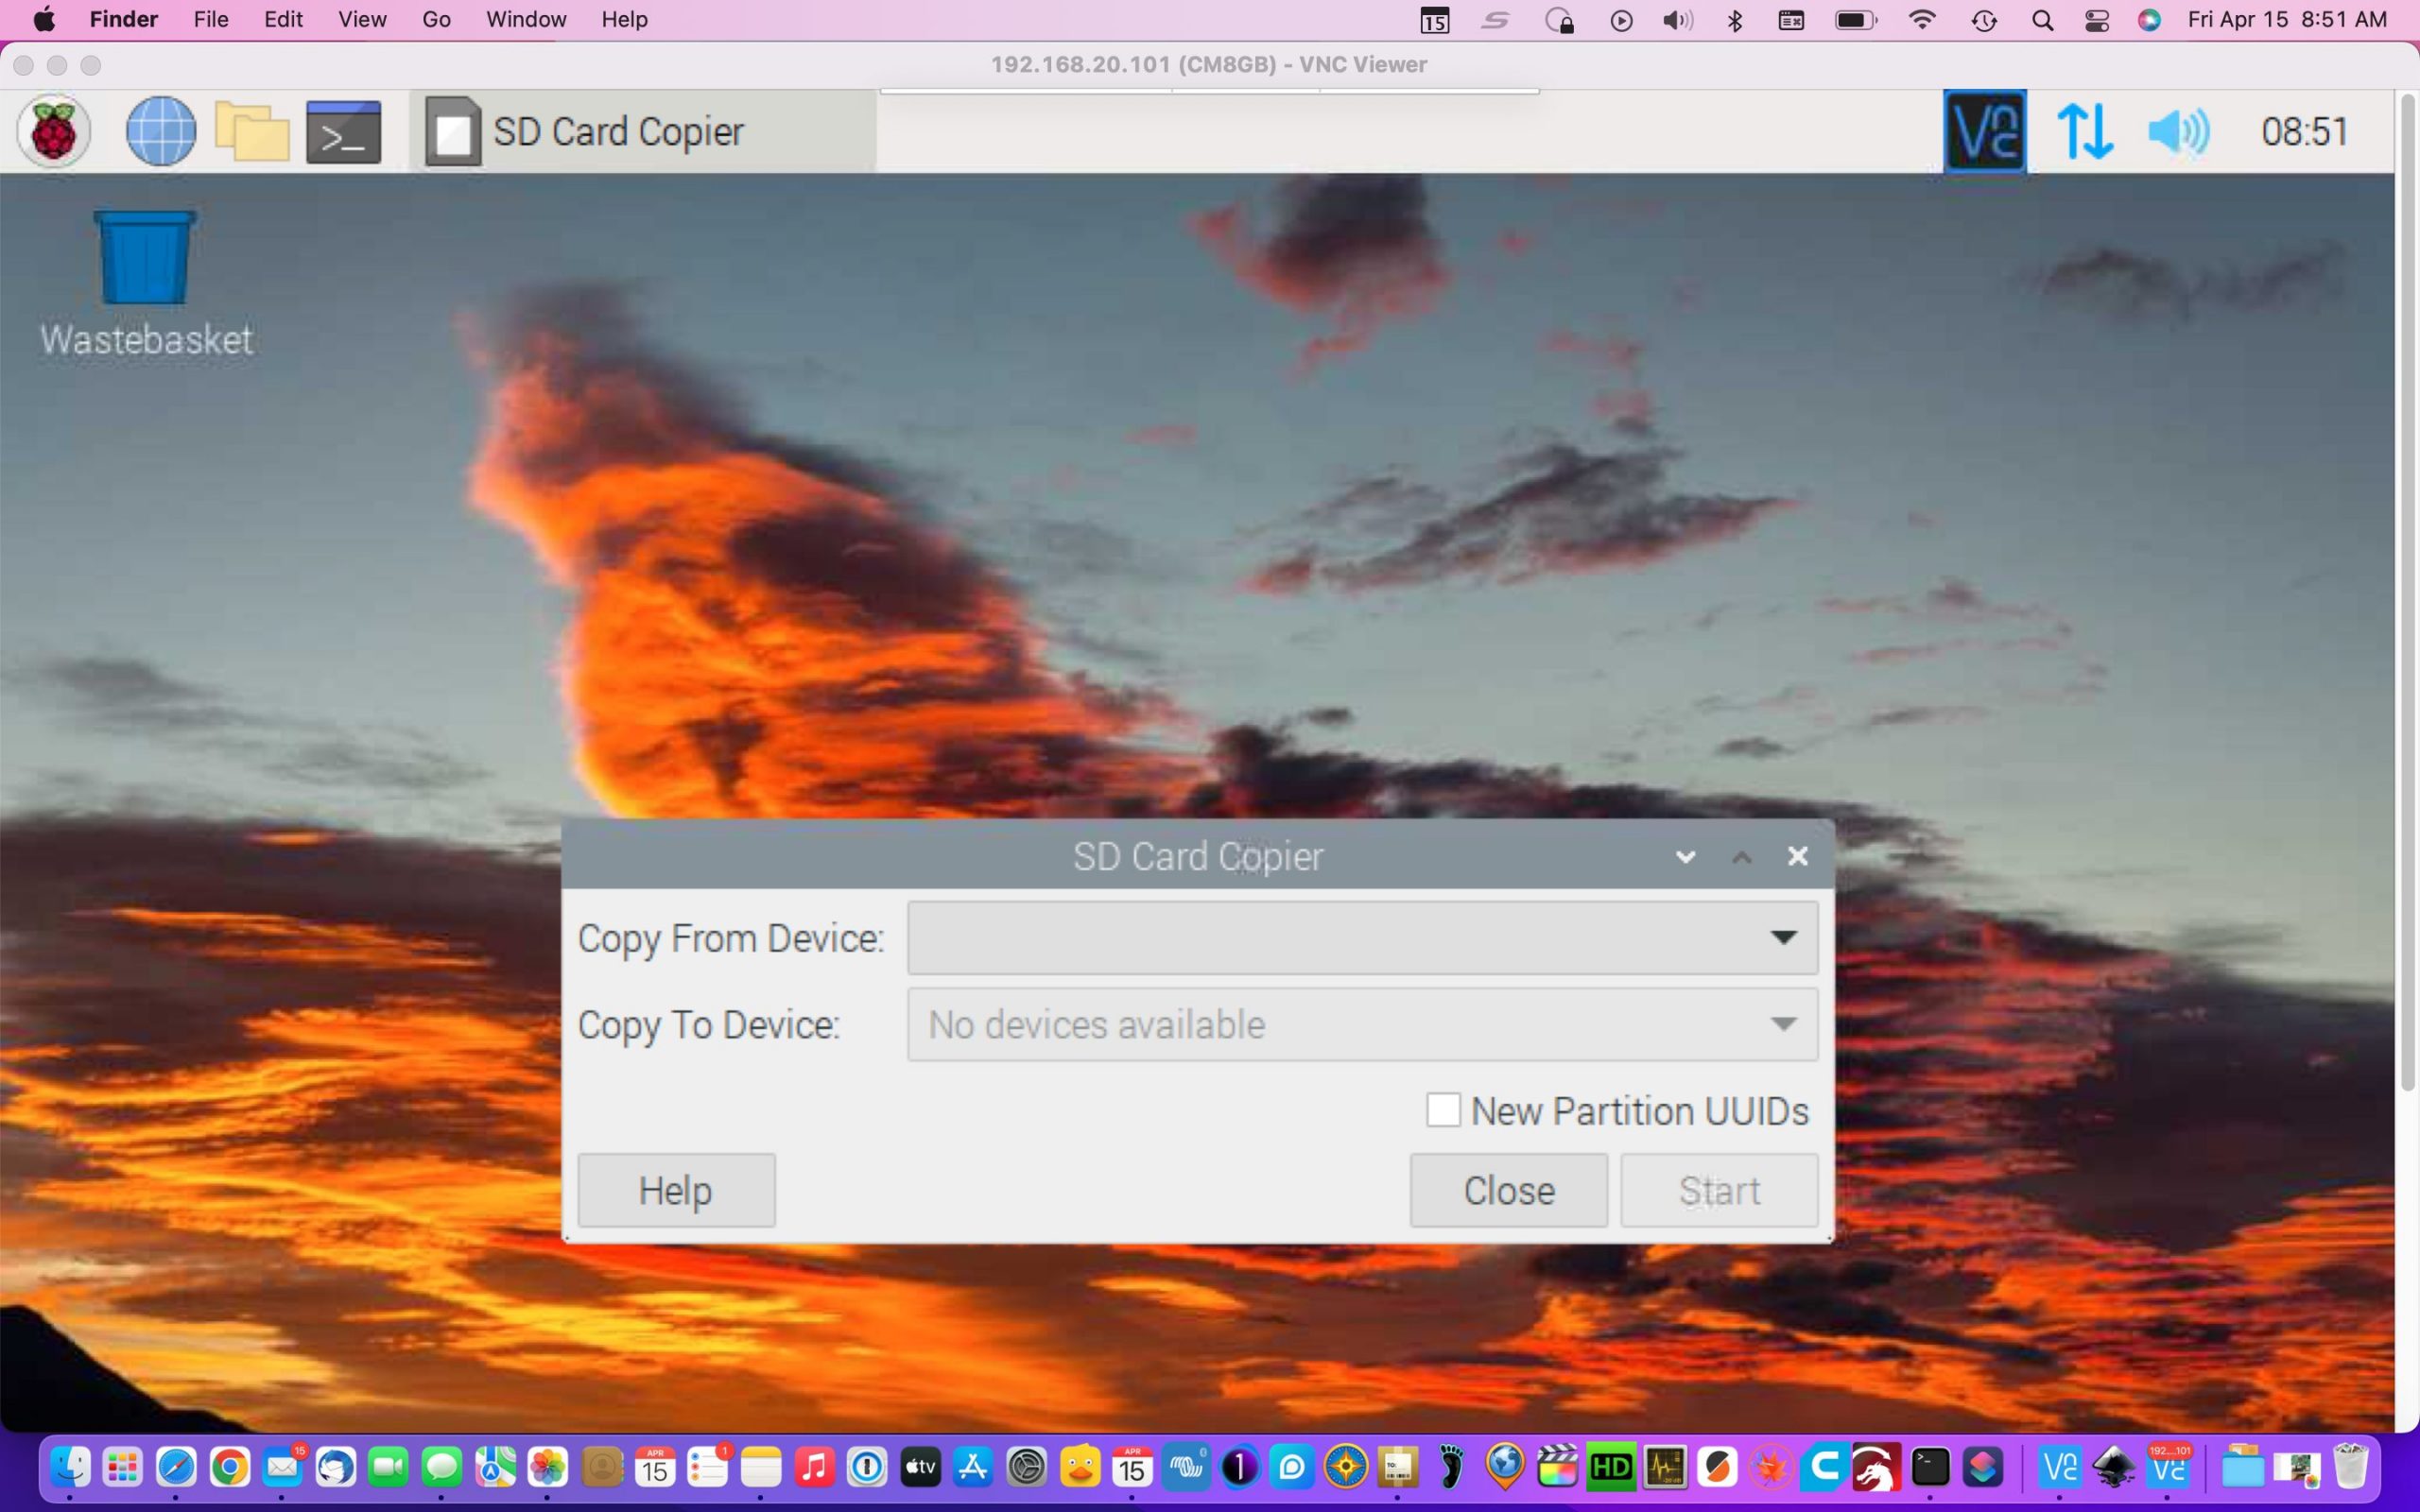
Now in Pi OS go to Accessories > SD Card Copier and copy from your eMMC or SD card TO your NVME Drive. Be sure to check the box that says “New Partition UUIDs”. Then go ahead and copy it. It will take a few minutes.
SD Card Copier (click pic to enlarge)
Now to fix the boot order.
This has to be programmed from a separate computer. I am doing this from a Mac with HomeBrew installed. Install the following before starting:
brew install libusb
brew install pkg-config
brew install coreutils
Now fetch the program for usbboot.
git clone --depth=1 https://github.com/raspberrypi/usbboot
Then cd into the usbboot directory and issue a make command.
cd usbboot
make
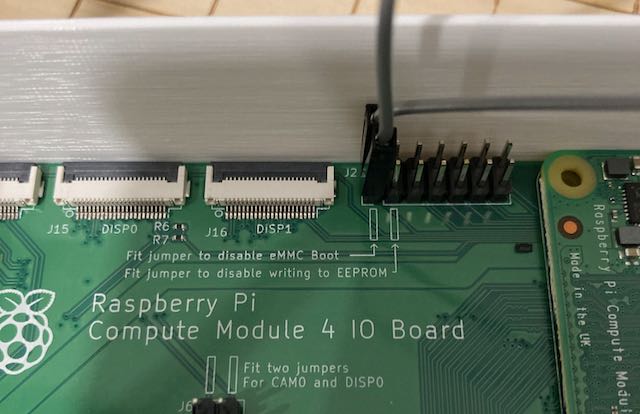
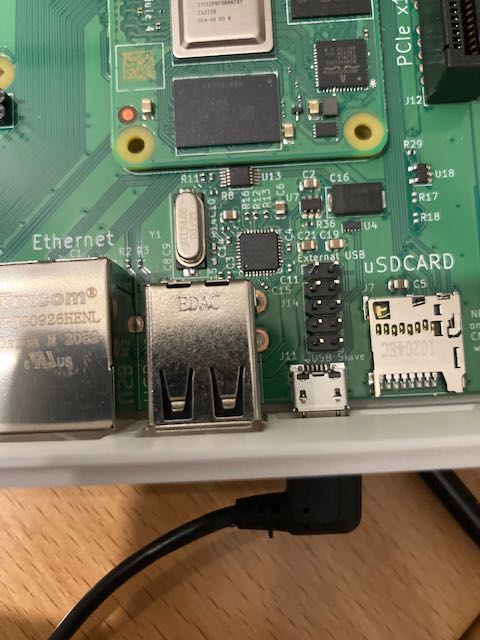
Now let’s prep the CM4 Carrier board. Hook a jumper pin or wire up to the pins shown below. (Disable eMMC boot). Short the pins, connect to the micro USB port to the secondary computer and apply power. A red status light will come on.
Bootloader CM4 (click pics to enlarge)
While still in the usbboot folder issue this command.
sudo ./rpiboot
You should see some boot loader activity. This was kind of a proof of concept to make sure everything works. You can power down at this point but leave the jumper on and micro USB connected.
While in the usbboot folder move to the recovery folder and alter the boot.conf file
cd recovery
sudo nano boot.conf
This is the boot.conf file
[all]
BOOT_UART=0
WAKE_ON_GPIO=1
POWER_OFF_ON_HALT=0

# Boot Order Codes, from https://www.raspberrypi.com/documentation/computers/raspberry-pi.html#BOOT_ORDER
# Try SD first (1), followed by, USB PCIe, NVMe PCIe, USB SoC XHCI then network
BOOT_ORDER=0xf25641

# Set to 0 to prevent bootloader updates from USB/Network boot
# For remote units EEPROM hardware write protection should be used.
ENABLE_SELF_UPDATE=1
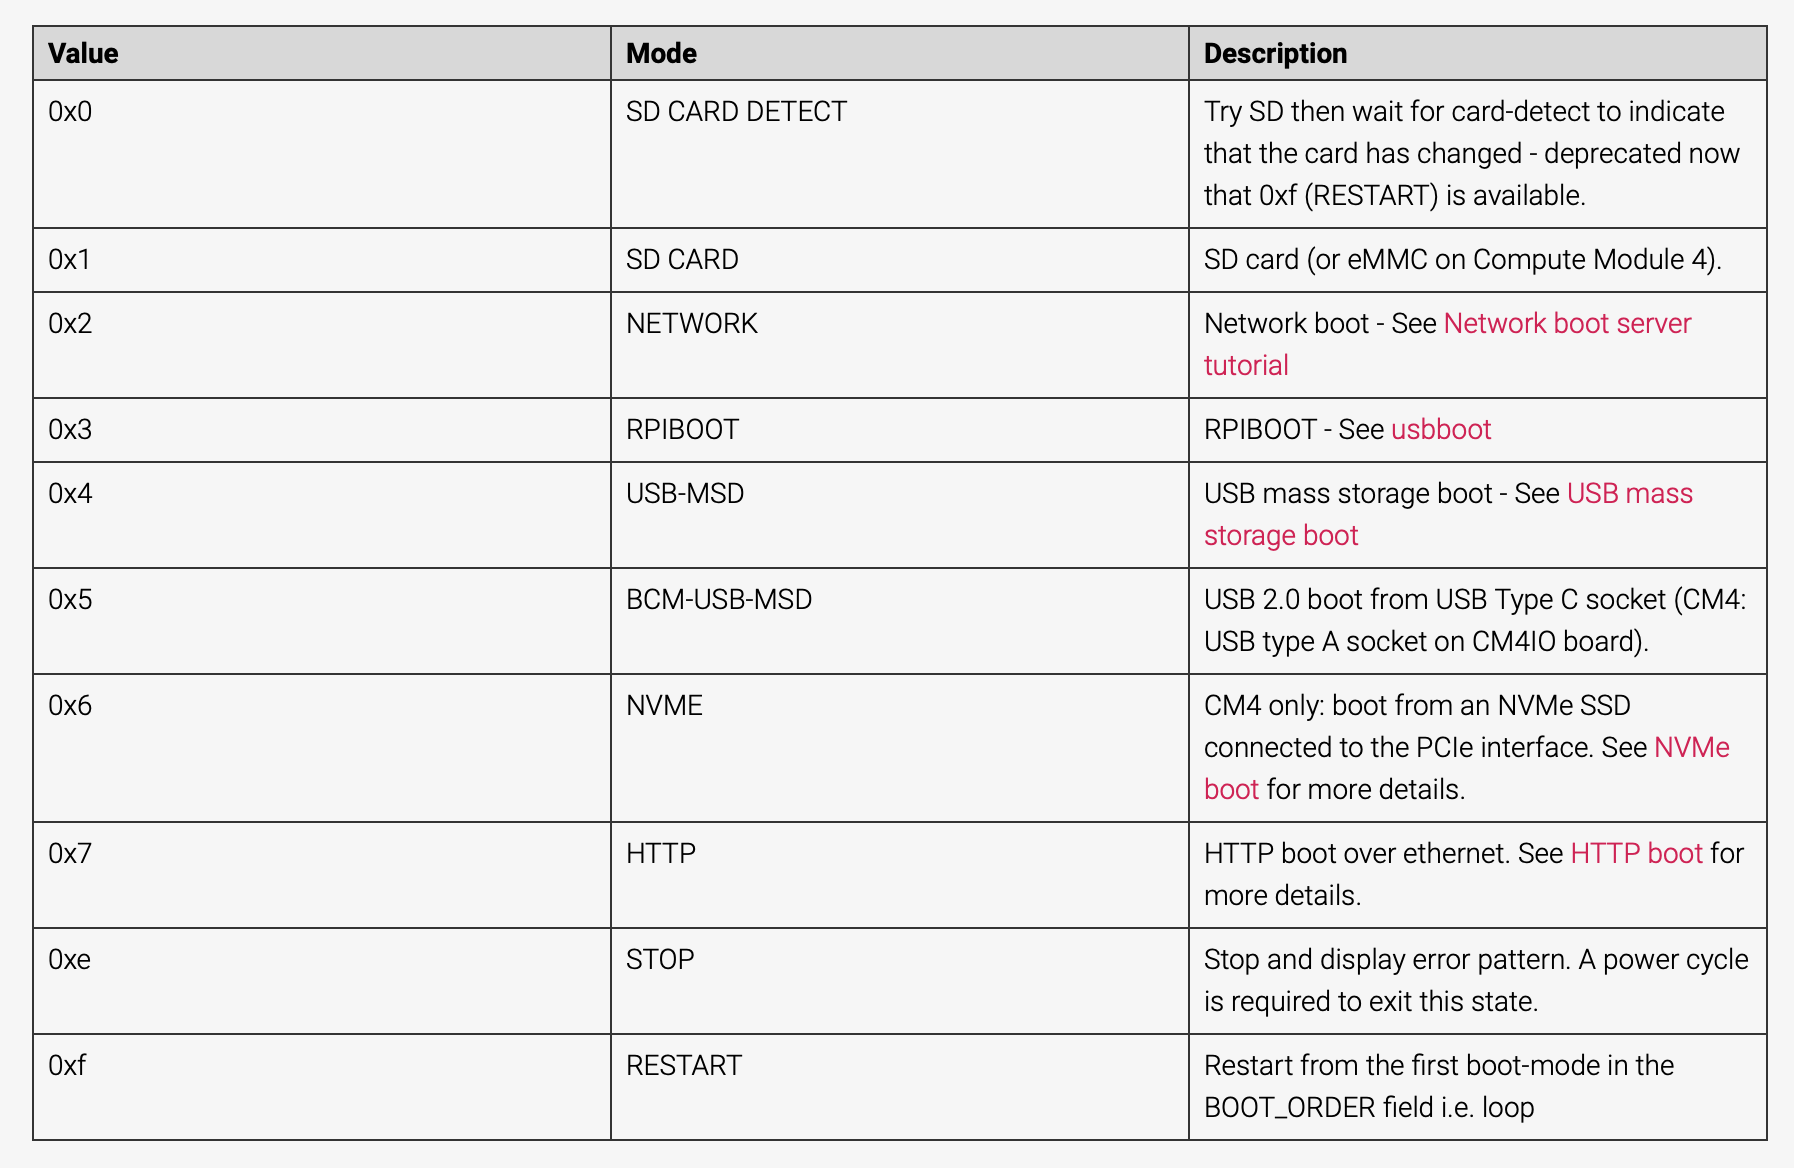
Note the line I have highlighted in Red. The boot order is read from right to left. The number 1 is the SD card and 6 is the NVME drive. Alter that line so the 6 is at the end of the line. Here is what the numbers mean:
Pi Boot Order (click pic to enlarge)
The default order is SD, USB mass storage, NVME, USB 2.0, and Network. Yep, you can boot a pi from the Network now.
Try:
BOOT_ORDER=0xf25416
This will cause the boot loader to try to boot from NVME first, then an SD card, etc. Once the change is made then hit CTL +X then Y to save. Also, know that once you modify this file it will stay that way for the next Pi unless you set things back to default or delete and download usbboot again.
IF THE BOOTLOADER HAD BEEN STARTED BEFORE, POWER DOWN AND POWER BACK UP.
Now power up your board and from the usbboot folder and then
cd to the recovery folder and with the CM4 board powered up run these 3 commands:
cd recovery
./update-pieeprom.sh
../rpiboot -d .
That should be it. Power down, remove the jumper and our CM4 should now boot directly from the NVME drive.

Pingback: Building a Fast Pi File Server | John’s Tech Blog
Thanks for collecting the info. I agree that for someone not even that familiar with linux finding and understanding this type of material is time-consuming. I followed you steps and received the following after running the pieeprom update step.
sha256sum not found. Try installing the coreutilities package.
I tried twice and the brew install coreutils command did not generate any errors. Is this error important?
Thanks
do a brew update and then brew install coreutils
BOOT_ORDER=0xf24156 ist besser bei eMMC
Reihenfolge NVME dann USB dann eMMC.
So kann ich auch mal ohne PCIe von USB booten.
Pingback: 树莓派cm4设置为从nvme启动