I got the inspiration to build up this Raspberry Pi NAS with a Compute Module and SATA adapter from Jeff Geerling. His blog page is here (linked with permission). If you like Raspberry Pi even a little bit this guy pushes the Pi to the extreme. His computer, networking, and Linux skills are exceptional and his delivery is easy to understand. If you visit his blog click the YouTube icon on the right side of the page and visit his channel.
Decided to turn my Pi Compute Module 4 into Network Attached Storage (NAS). A real NAS. While a Raspberry Pi NAS won’t light the networking world on fire it is more than adequate to serve up files. I want to put this NAS out in my Shed for two reasons.
- Redundant backup in case the house burns down
- Use Squeezelite client to stream audio to my shed stereo, a circa 1980’s Technics Receiver.
I have a mini-ITX case and guts to put a “real” server out there but my shed is a woodworking shop and push come to shove I’d rather gum up the fan and overheat $100 worth of Pi and Compute Module IO board than to blast a $450 server motherboard. Besides lots of sawdust it gets wicked hot and wicked cold in the shed too. This computer is going to get dirty and this is a choice of economics as much as anything.
Making a Pi NAS is easy but it also ends up being a spaghetti mess and unless you design and 3D print a custom case the Compute Module just isn’t organically designed to fit any standard case out there. We gotta get creative.
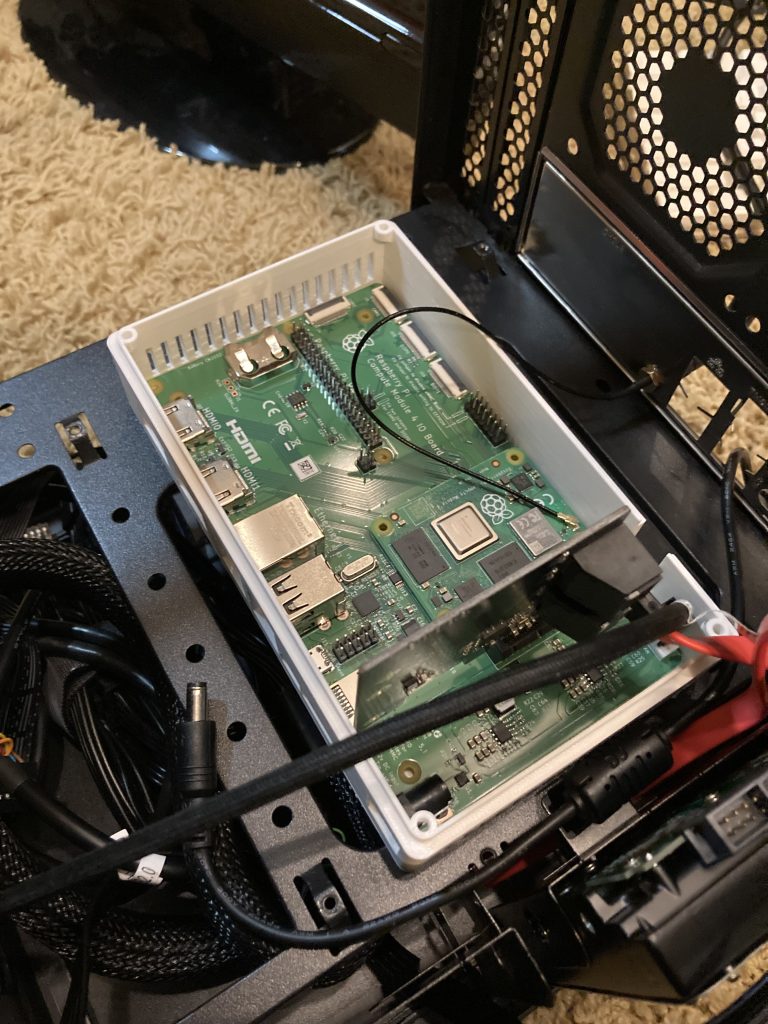
My cheap case is a Mini ITX case. How I dealt with the installation was to keep the 500 watt power supply intact and to 3D print a case for the Compute Module IO board. Then I just double side taped that to the inside of the enclosure. Here’s a quick video of the build with details to follow.
We need a power supply ONLY to provide power to the hard drives via the SATA cable. I suppose we could use the power supply to give us 12volts to the compute module but that would require me to buy a Molex adapter and cut it and fit it into a barrel connector adapter, etc, etc, etc. For now I’ll just power the Pi with the brick I have.
The bad news here is that an ATX power supply won’t power on unless it is plugged into something or tricked into thinking it is plugged into something.
So a regular ATX power supply typically plugs into your Motherboard, which doesn’t exist here, and of course the power is switched by a button on the case.
No pusha da button, no getta da power.
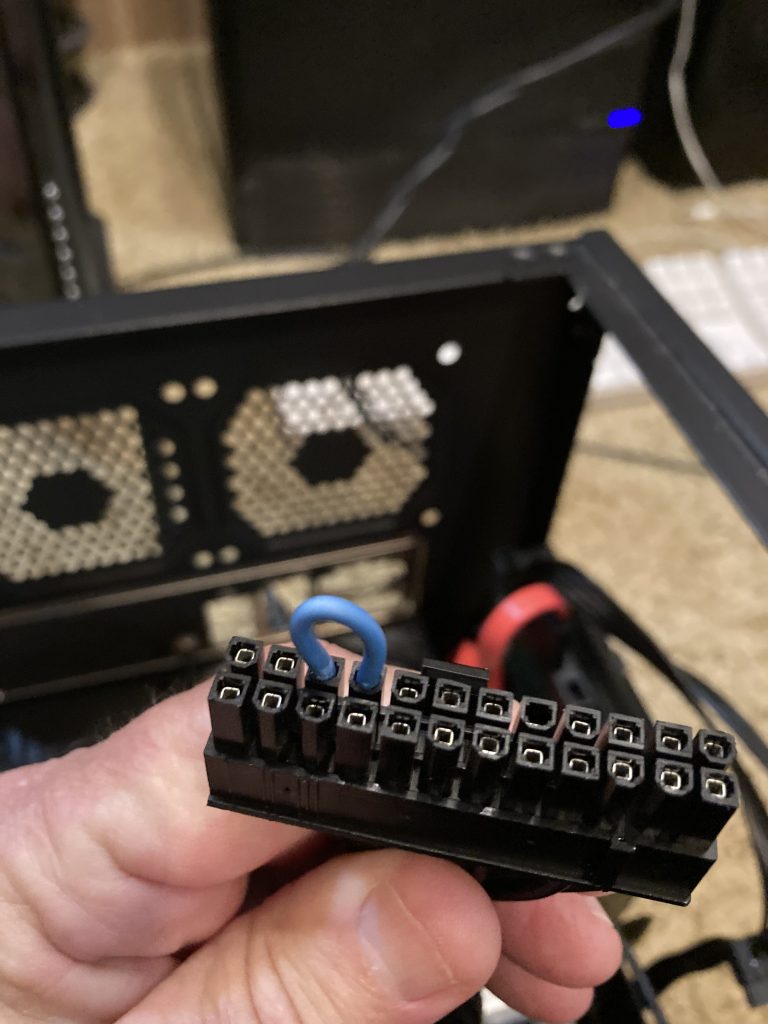
Because we’re using a Compute Module we need for the power Supply to come on WITHOUT THAT SWITCH. We gotta cheat, and we gotta trick it. We do that with a jumper from 5V to any Ground pin like so:
ATX Power Supply Jumper for External Use/Testing (click pic to enlarge)
3rd and 4th pin from the end. Note where the securing tab is at.
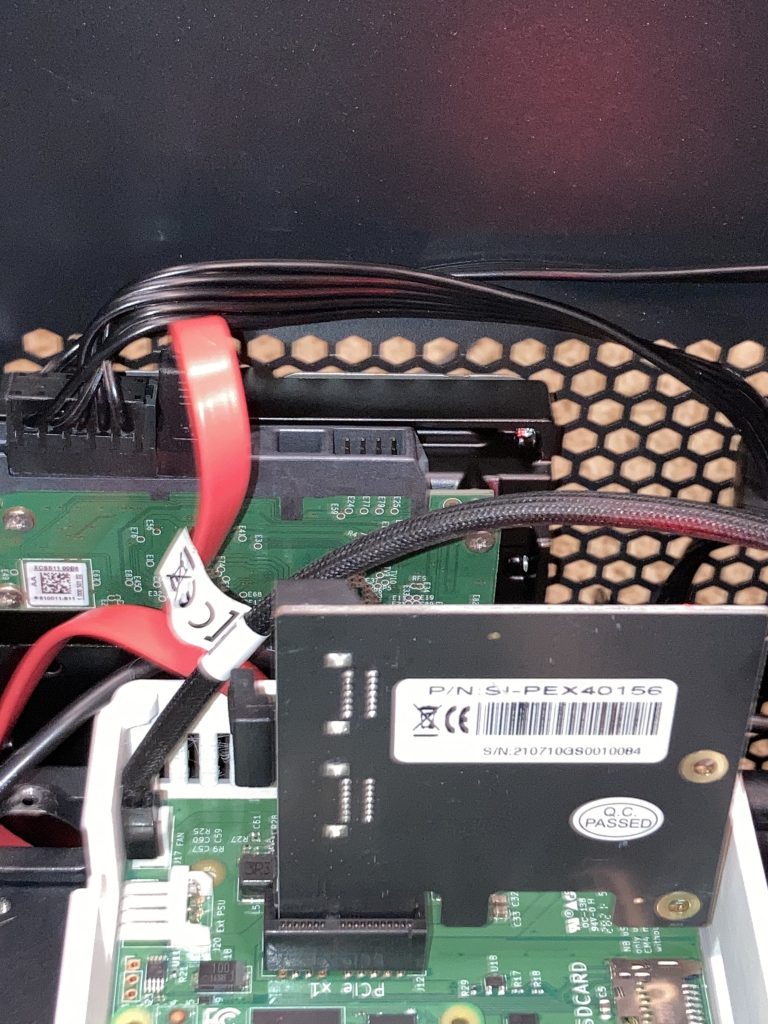
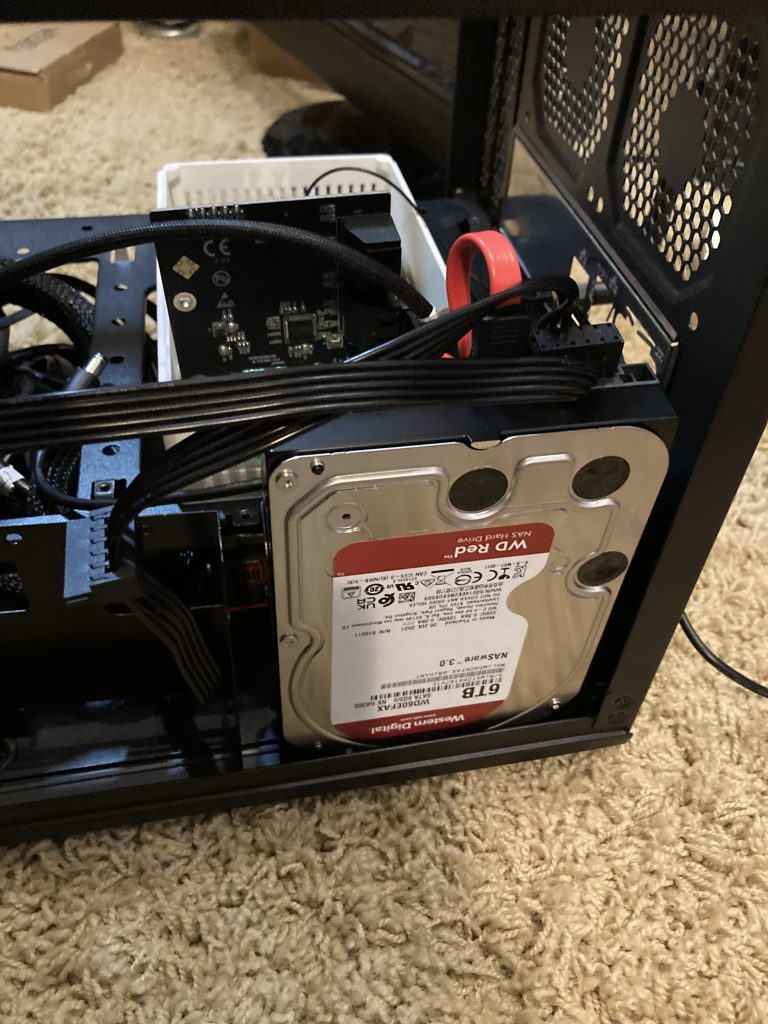
Once that is accomplished you can install the SATA board in the Compute Module PCIe slot and connect the SATA drive and SATA power from the power supply to the hard drive. I’m using an IOCrest 4 Port SATA PCIe Board. The board works right out of the box with Pi OS.
SATA Board and Hard Drive (click pics to enlarge)
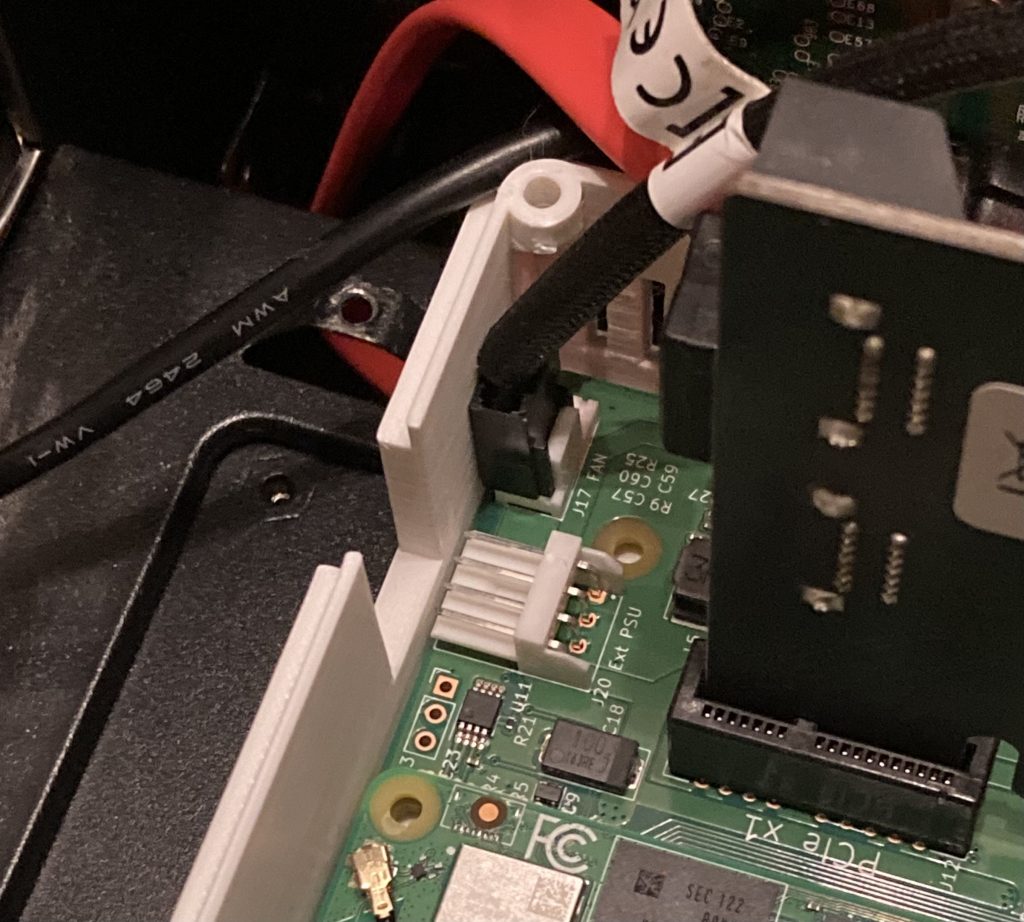
The Compute Module also has a 4 pin header for a case fan which I also hooked up. The 3D case I printed for the Compute Module IO board has a fancy cover however I opted to leave it off so the large case fan would blow right across the board.
CM4 Fan Connector (click pic to enlarge)
Once the computer is booted you can check the SATA board by typing
lspci
This is what you should see:
pi@CM4PI:~ $ lspci
00:00.0 PCI bridge: Broadcom Inc. and subsidiaries BCM2711 PCIe Bridge (rev 20)
01:00.0 SATA controller: ASMedia Technology Inc. Device 1064 (rev 02)
And once you have formatted your hard drive (I used gparted) and then mounted it, you can check it with
lsblk
That nets you:
pi@CM4PI:~ $ lsblk
NAME         MAJ:MIN RM  SIZE RO TYPE MOUNTPOINT
sda            8:0    0  5.5T  0 disk
└─sda1         8:1    0  5.5T  0 part /home/pi/nasdrive
mmcblk0      179:0    0 29.1G  0 disk
├─mmcblk0p1  179:1    0  256M  0 part /boot
└─mmcblk0p2  179:2    0 28.9G  0 part /
mmcblk0boot0 179:32   0    4M  1 disk
mmcblk0boot1 179:64   0    4M  1 disk
Success! Then you can add your drive to Samba. I’m going to stop this right here because I have one more 6TB drive coming and then I’ll install OpenMediaVault (so I can RAID the 2 drives together) with this command:
wget -O - https://github.com/OpenMediaVault-Plugin-Developers/installScript/raw/master/install | sudo bash
OMV only installs if you use the Lite Version of Raspberry Pi OS. You can’t have the Desktop version running. Before you install make sure the Wifi is configured. It works great and configuration is a little weird. I Striped (RAID 0) my drives together. Setting that up, with the file system, and configuring SMB was a tiny PITA but I worked through it. OpenMediaVault is an awesome program that lays on top of Pi OS and gives you a nice graphical interface controlled from a web browser by navigating to the IP address of the CM4 Pi.
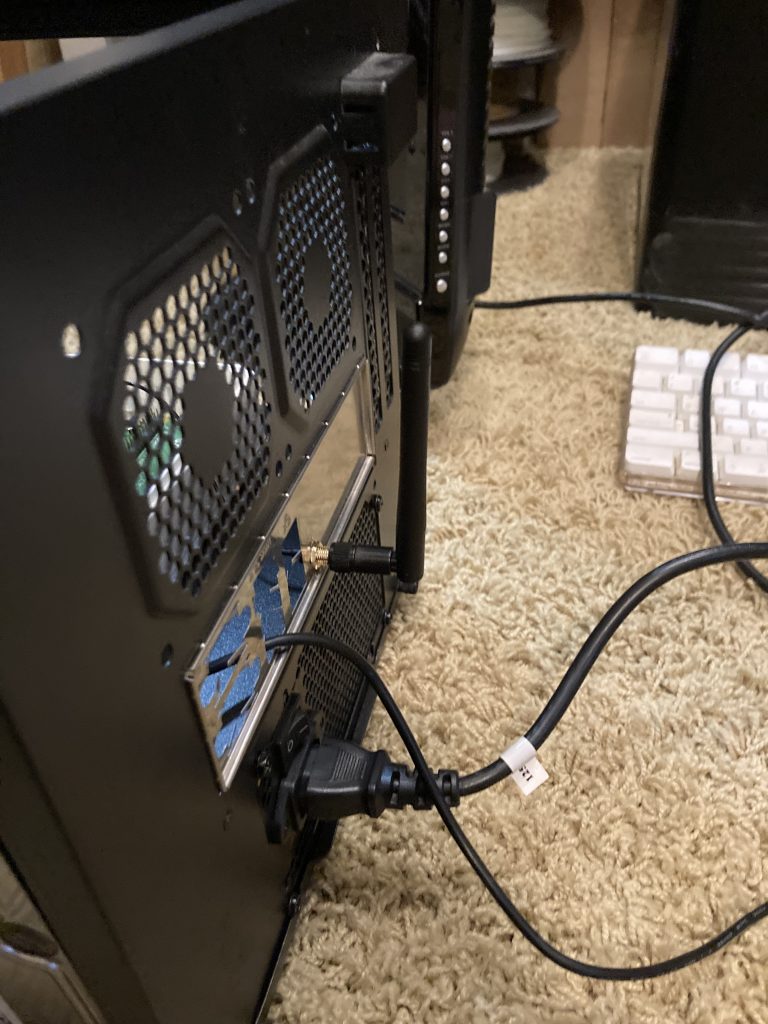
Lastly, I bought the WiFi antenna kit for the Compute Module and found that the motherboard panel had a perfect 1/4″ hole in it for mounting the antenna on the outside of the case. No Faraday Cage stuff going on here.
Compute Module 4 Antenna Kit (click pic to enlarge)
Things I DON’T like
- No right way to turn the Pi to accommodate for connecting power to the Pi, or the antenna kit or the SATA card. As it is I had to snake the Compute Module power wire through an open hole in the back. Not terribly aesthetic.
- Big Case, Little Computer Board. Overkill.
- SATA Board not tremendously secure. Fortunately it won’t get bounced around any and will be sitting high on a cabinet in its final resting place.
- Power Supply has 3 SATA power ports……………SATA board has 4 slots. Not a problem yet as I’ll only be running two 6TB hard drives.
- It’s not going to be a speed demon with lightning fast network benchmarks.
THINGS I DO LIKE
- The Cost – I’ve mentioned that several times. Try to find a NAS with no drives that costs $100
- Small enough to use in about any case.
- Sips power compared to a full sized computer.
- Fun and keeps the Linux skills sharp.
- Whether you run Pi OS or OpenMediaVault it is basically Debian Linux and you can use that underlying OS for other things. Since mine is sitting on a shelf in the shed next to an old stereo……….WHY NOT USE IT TO STREAM AUDIO? I run LogitechMediaServer at home and all I had to do to was install “Squeezelite” (client) on my system to make it a media streamer. The instructions to do that are here. When naming my client I called it “shedhouse”
Squeezelite Client (click pic to enlarge)
To get Audio though you need to add a sound card of some kind. I used a USB Digital to Audio Converter (DAC) from HiFiMeDIY. The one I linked is $30. I have a more expensive one but I also have several that I bought years ago for like $15. I was a little surprised to see the price increase. (No I Wasn’t). Anyway you can use any USB DAC and can probably get one for a song on eBay.
And here’s a video of it instead in my workshop serving up my files and being my streaming media server as well.
GOTCHAS
Yep, there are gotchas. There always are. Mine was this:
I set the machine up in the AM and I was streaming fine from my upstairs router with a good signal. As the day progressed the signal got weaker and weaker. My shed is maybe 75′ from the router with of course some walls in the way. How I got around this was to take the crap antenna off of the Compute Module Antenna Kit and replaced it with a 5GHz antenna from an old router I had. Big old long element. Middle of the day and my signal is adequate again.
To be fair to the antenna kit, I am really stretching the limits of a 5GHz wifi signal. I might even get an outdoor antenna to boost the signal even further.
Also, AND THIS IS IMPORTANT……………If you add the antenna kit. YOU HAVE TO ENABLE IT IN /boot/config.txt. Add this line to the bottom of the file:
dtparam=ant2
sudo nano /boot/config.txt

#Enable External Antenna
dtparam=ant2
In an interesting observation I noted that from my router to my shed way in the backyard with the external antenna enabled my signal strength was higher when it WASN’T enabled. However, I went from having 1 wifi signal to 18, yes 18, signals. One of the 2.4 GHz signals from the house was WAY stronger than the 5GHz channels I was hoping to latch onto. At any rate ENABLE THE EXTERNAL ANTENNA or you’ll wonder why the heck it doesn’t work.
CONCLUSIONS
Nothing is perfect. The big upside is that I have $100 worth of motherboard and re-purposed some old stuff I had laying around to build a NAS. This was extremely low cost and the results will be way more than adequate.
The antenna kit is just not that good, at least under my circumstances. Best to source a real antenna from a ham radio store or do what I did and steal an antenna off an old router.
And good luck finding a Raspberry Pi Compute Module. I’m trying to source a 2nd one now, quite unsuccessfully I might add. When some places get stock the flippers buy them all up and seemingly sell them on eBay for 3x’s the price.
Anyway, anyone can buy a NAS. That’s no fun. This was fun.


If you use a toggle switch to bridge pins 15 and 16 on the ATX 24-pin connector you can turn on and off the supply. Of course this is a ‘hard’ switch and not the software controlled power off, so you should power off the pi first with ‘sudo poweroff’ command. I also believe you can dispense with the power brick and connect using the ATX’s floppy 4-pin connector to IO board’s J20 connector to power the pi. Lastly, I wouldn’t bother with the 3D printed case. Just mount the pi via the mounting holes using standard motherboard hex standoffs to that bracket which you taped the 3D printed case to. This allows for for direct cooling from case fan. Came across you site while working up a design of my own.