
DISCLAIMER: I’M NEW AT THE CNC RACKET. THESE SETTINGS WORKED PERFECTLY FOR ME AND ARE ESSENTIALLY MANUFACTURER RECOMMENDED NUMBERS. YOU SHOULD USE YOUR GOD GIVEN KNOWLEDGE AND YEARS OF EXPERIENCE AND TRIAL AND ERROR WHEN SETTING UP A DIAMOND DRAG BIT. I DON’T PROFESS TO BE AN EXPERT AT THIS. YET.
I recently bought an MC Etcher Diamond Drag bit from Carbide 3D . I opted to get the 90° bit. What a diamond drag bit does is to gently etch the surface by dragging across it and scratching the substrate. The diamond bit uses compression (spring loaded) and does not spin during cutting operations.

Diamond Drag bit
This results in a very NARROW line that shows incredible detail especially compared to a rotating engraving bit which produces a much thicker cut line.
Where a laser may slightly burn the surface the drag bit scratch also produces a clean, white line that exposes all the detail or it can of course be used to fill in vectors or text.
One downside you’ll see when researching these bits is that they CAN wear out quickly, however I suspect that many wear out or the tip breaks due to improper settings or excessive pressure.
Here’s how I set mine up in Vectric VCarve Desktop. First of all if you download the latest tool library there will already be a Diamond Drag bit listed in the Specialist category. All we are going to do is to alter those settings.
Let’s get to it.
I used the recommended settings on the Carbide 3D website.
- Feedrate: 60 in/min
- Plungerate: 30 in/min
- Cut Depth / Compression: .015″
- Line Width: 0.005″
- Diameter : 0.25″
- Angle: 90° (unless you have a 120° bit)
- Stepover: I used a stepover of 0.012″. Your mileage may vary with this one especially when doing a Fill instead of an Outline. Play around with this.
- Safe Z height – Must be set at a height to provide adequate clearance for non-cutting movements. Mine is set for 0.2″. That means you wouldn’t want to compress your drag bit more than or right at 0.2″ as when it lifted to move it would still contact the surface. A better explanation of this can be found here.
Looks like this in VCarve:
Diamond Drag Bit Settings in Vectric (click pic to enlarge)
")
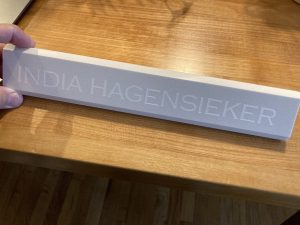
Because the bit is diamond tipped you won’t be able to use your zero Z block to set Z height. Because this is a compression tool you just need to lower Z until the bit JUST touches the work surface. Then zero your Z height. the results are amazing. This is my first carve.
Drag Bit First Engrave (click pic to enlarge)

The USN emblem is PERFECT. Flawless. To the left of it is a DOD emblem that was cut with a Sainsmart 3018 Prover desktop CNC and 20° engraving bit. Substrate is black acrylic. The DOD emblem is ugly and while you can’t see it well in the photo the left side of the emblem is barely visible. Guess it wasn’t PERFECTLY flat.
With a slight increase in Stepover I am getting great results on piece of granite.
Turned out like this when finished:
Diamond Drag Bit etching
Anyway. I’ll keep this short. Use those settings, change things you know won’t destroy your bit, and Bob is your Uncle.
Hi John,
Great information.
I have a Next Wave 510 with 2.5HP Spindle.
Any idea where I would find the best settings?
I may have missed it but how do you set the Z on a
spring loaded engraving bit.
Thanks
-Chris
Rockford, IL
Set your Z with the paper method. You want the bit to touch and just BARELY compress. Then you want to make sure your safe Z height is adequate for that. Safe Z is how high it lifts when it makes non-cutting moves.
So if your bit compresses .05, your safe Z has to be higher than that and considerably higher if you are trying to miss clamps or some other obstruction.