
Adding an external, more powerful air assist is a MUST DO upgrade for your CO2 laser. There are many guides on how to do this however none of them are specific to a laser which has a Ryxon KT332N Controller. Larger lasers use different controllers and the controller connections have a different name on them on the KT332N which may confuse some users.
I’m not doing an inclusive build of materials here. This will just cover wiring the solenoid to the controller.
First of all you need a 24volt Solenoid which is Normally Closed. That means air only spews out when the solenoid is energized electrically from the controller. So you need:
- Solenoid
- Wire – you can use any wire as long as it will handle 24 volts and about 250 degrees F. I chose this wire simply because it is jacketed and it is easier and cleaner to route 1 cable, than 2 separate wires.
Also note that the solenoid is non-polarity specific so that means you don’t have to observe polarity at either end however where the wires are connected to the controller you SHOULD follow standard color coding in case you sell the machine or if it catches on fire the fireman will blame your backwards home brew wiring for the cause of the fire 😃
On MOST controllers one of the appropriate terminals is labelled “WIND” and every video you watch on YouTube University will show you hooking one wire to the “WIND” terminal. Of course on the KT332N it isn’t the same. On the KT332N the appropriate terminal is named “AUX AIR”. Wire it as per the picture below:
Red Wire = +24 V
Black Wire = AUX AIR
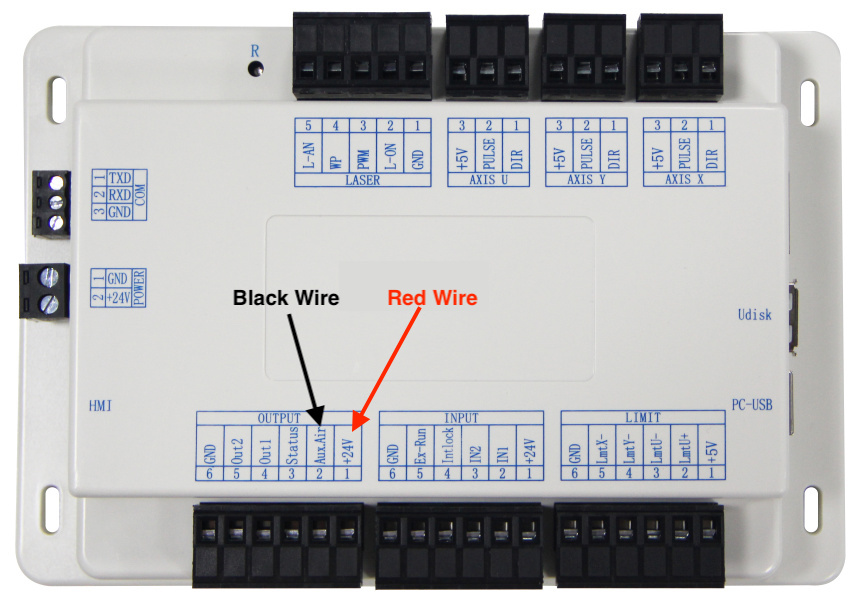
KT332N Air Assist Wiring
On the other end, again polarity doesn’t matter but I wired mine like the pic below. Ignore the green ground wire. There are just 2 wires going into the solenoid.
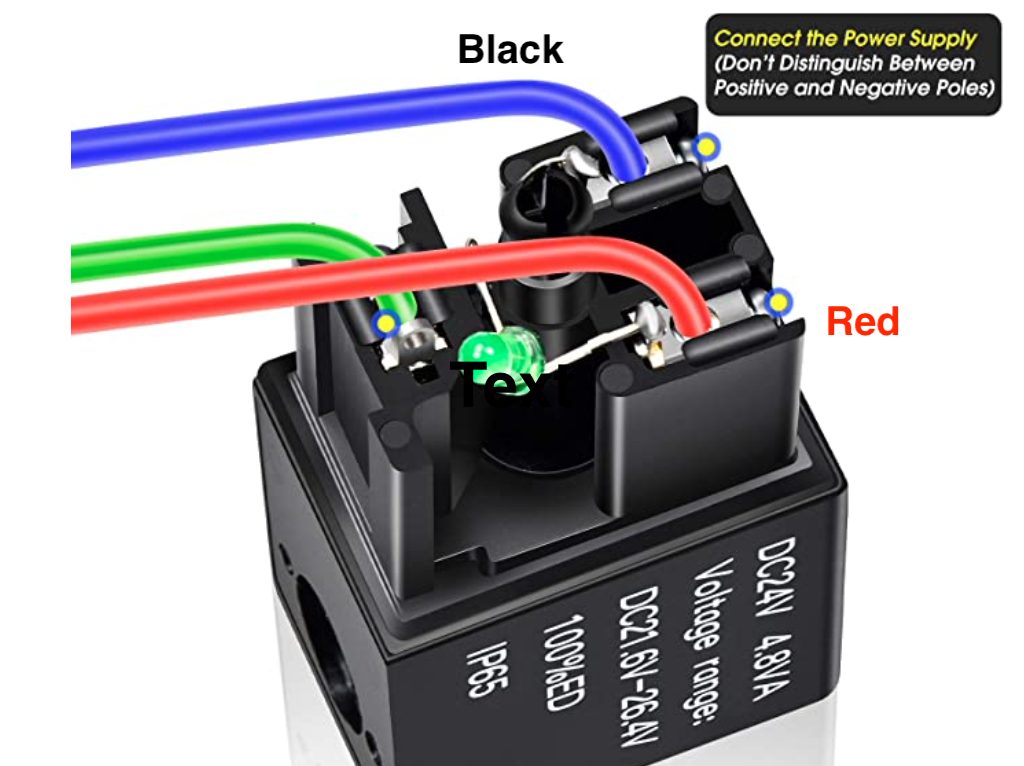
24volt Solenoid wiring for laser air assist
Anyway, that’s it. The big news here is that “WIND” is called “AUX AIR” on the KT332N
hi there thanks for the info on this i have been looking for some help.
don’t suppose you have a wiring diagram for the kt332n controller as i want to add a stepper motor the get the bed motorised
thanks