
Yes Uniden makes a GPS kit for their scanners. It’s $80. You can DIY one up for less than half the cost. And it’s fun to make your own stuff and you’ll learn a thing or two as well.
Here’s what you need.
- GPS Puck – I used a GlobalSat BR-355S4 $35 approx
- USB cable – USB A to USB Mini Type B (4pin) $4.50. You will not walk in a store and find one of these. They are just a little hard to find. I used a Promaster #3696 cable.
- Skillz – Mad Skillz
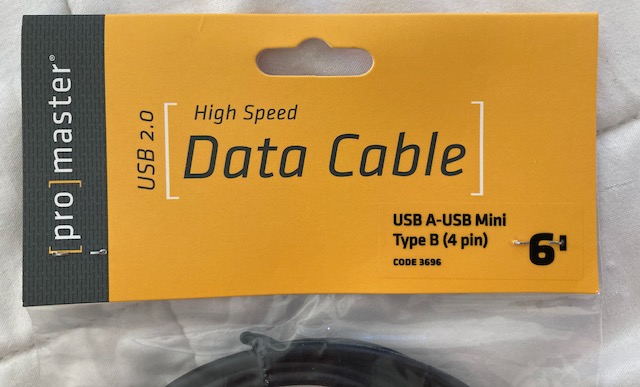
Promaster #3696
Cut the data cable in half and strip both ends. The cable wire color codes are standard for this kind of cable.
- Red = Voltage +
- Black = Ground –
- White = Data Wire + (This is the Receive RX on the GPS)
- Green = Data Wire – (This is the Transmit TX on the GPS)
On the end that has the regular old ordinary USB connection we are all familiar with (USB A) you only need the red wire, and black wire. Red for +5 volts, Black for ground
On the end that has the very bizarre choice of the Mini Type B 4 pin male you need the Red, White, and Black wires.
Cut the connector off of the GPS puck cable end. On the GPS puck you need all four wires. Red, Black, White, Green.
Now wire it together like this. Work across the rows (i.e. the green wire on the puck goes to the white wire on the serial cable to the scanner)
| GPS PUCK WIRES | 4 PIN CONNECTOR TO SCANNER | USB A POWER | |
|---|---|---|---|
| GREEN | WHITE | Data wires | |
| WHITE | BLACK | Data wires | |
| BLACK | RED | BLACK | Ground |
| RED | RED | +5 v |
And then test it before you solder and clean up the connections.
Related, but different subject: Do you know the pinout on the USB Mini B 4p connector on Uniden’s USB-1 programming cable? I want to make an FTDI chip USB programming cable for my Uniden BCT15X.
Thanks for the great D-I-Y guide to adding GPS to the Uniden Home Patrol. I’m located up here in Statesville, N.C. I just got the GPS puck in from Amazon, I’m waiting for the Data Cable to arrives, so I can hack it all together with your instructions! Thanks for the great guide.
Mack, what data cable worked for you? I ordered the Promaster 3696 and it wont plug into my home patrol2. Thanks
Hey,
Does this hack work with Home Patrol 1 ?
I have a Uniden GPS kit BC-GPSK will this work to mack the GPS that is in this video?
Hello;
I’ve been trying very hard to make my old patrolman 1 work with John’s idea, but I’ve ran into a issue I’m hoping you may have an idea about.
I apparently ordered the one of two possible GPS 4 pin connectors, because it will not fit. I cannot spend anymore cash right now due to my medical issue that I had to retire from EMS over, and wondered– is there a way to take apart the patrolman 1, and hard wire this in — or — a way to change the female plug in the radio itself?
Any info you have would be great! Thank you,
Doc Lykins NREMT-P (Ret.)
Thanks for the great idea! I have a Home Patrol 1, so I hope it’s the same context… I do have one other question; our county in Virginia as well as Richmond PD switched frequencies. Is there any way my Home Patrol 1 can somehow pick these back up with a different antenna or such?
Thanks!
Doc Lykins
EMT-P (Ret.)
Great DIY, I too am doing this but I have run into a problem the gps unit in the article is no longer sold so I bought what I think is it’s replacement, the BR-355N. I got it all wired up and working but I have a lock button on GPS enabled that I can’t turn off. Does anyone have a fix for this? Does the BR-355N work as a replacement?
Thanks
Rory-N6OIL
HomePatrol2
Gentleman,
I have tried this wiring hook-up and others, still can’t get radio to see the GPS.
GPS is Flashing red.
Anyone know the pin out for the radio GPS connection?