
Above you working silently are Geostationary Operational Environmental Satellites (GOES). They are operated by NOAA and are essentially weather satellites.

Now here’s the current configuration above. Seeing as how I live on the East Coast of the US I aim at GOES-16 or GOES East. Getting the signal is a bit of a challenge and requires some special hardware.
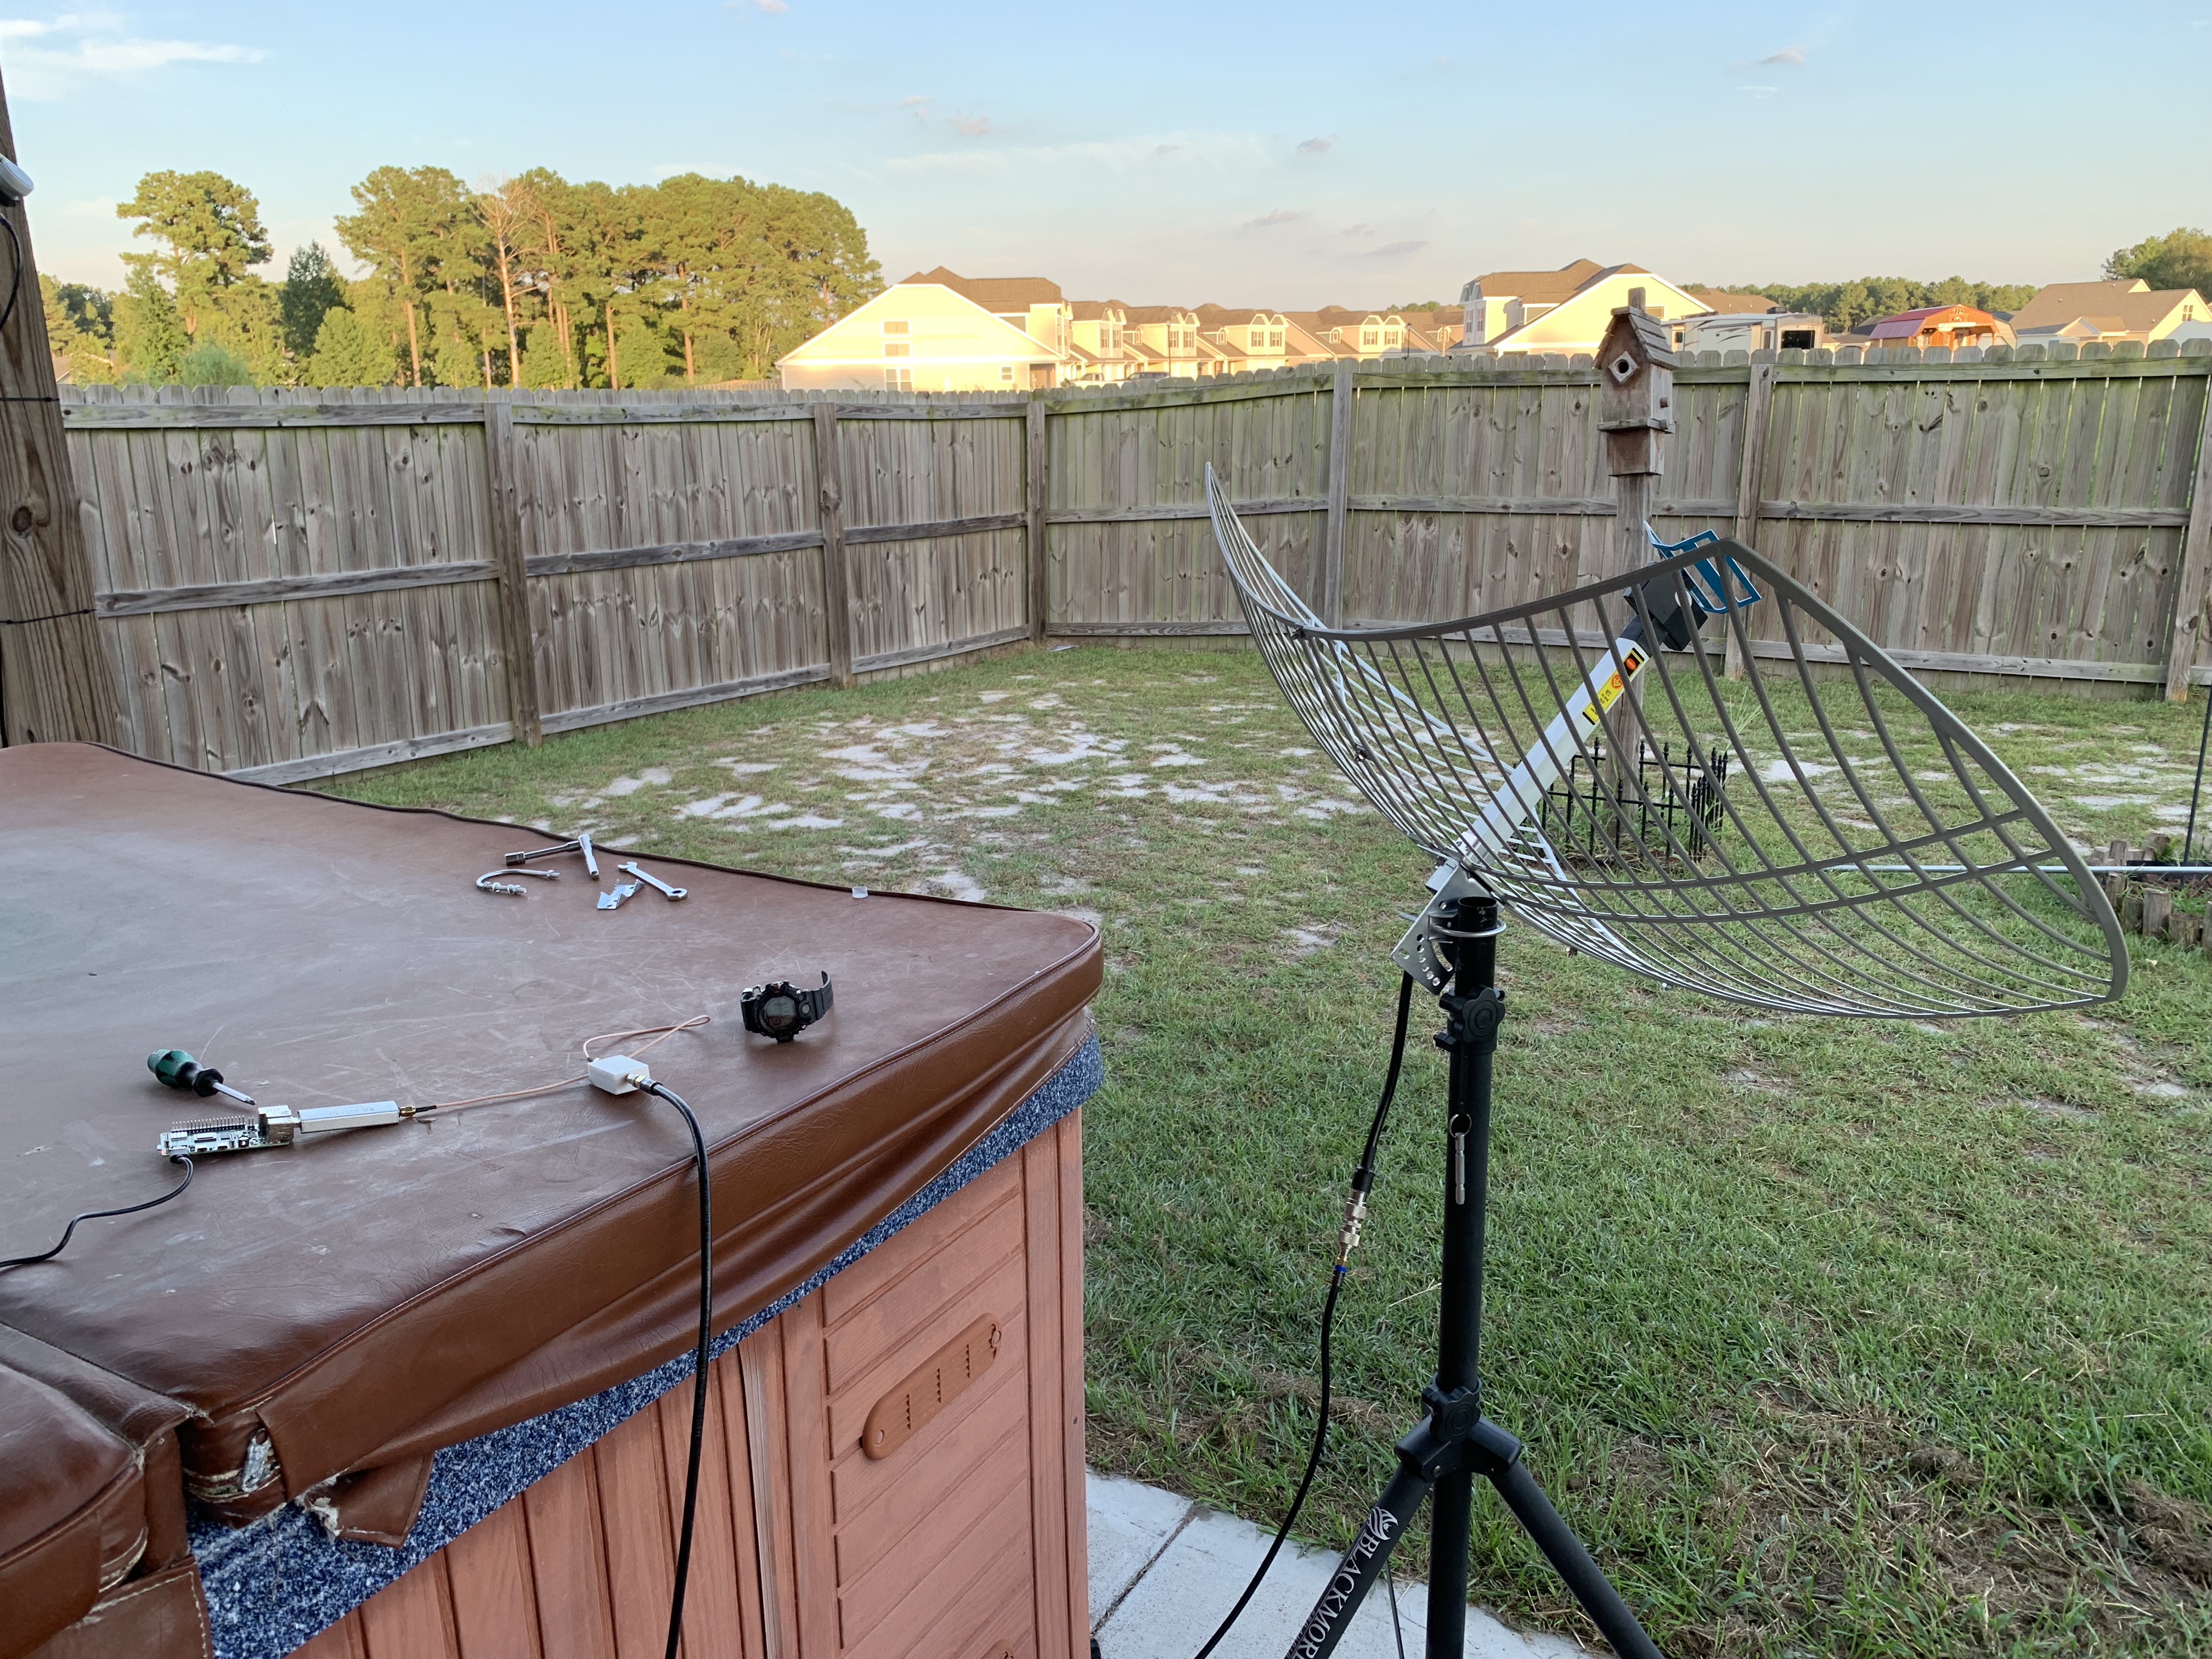
Here’s what you need to acquire a signal:
- RTL-SDR device capable of receiving up to 1.7 GHz. I used this one.
- Antenna capable of receiving around 1.7 GHz. Even though this one calls itself a 2.4 GHz antenna, it works
- Low Noise Amplifier (LNA). This one is specific to GOES signals. This is barebones with no case. Ones with cases are a little more expensive.
- Optional 3D printed case for Barebones LNA above. File to print from Thingiverse here .


- Adapter to get LNA right next to antenna
- Wire or coax with SMA Male on both ends. Length will vary according to your setup.
- Computer with SDR program such as SDRUno or SDR# (optional)
- Raspberry Pi 3 or 4
So the first thing I did was to hook up a computer with the RTL-SDR device plugged in and tune to 1.6941 GHz and then look for the GOES HRIT signal. Finding the satellite is tricky and you need a proper compass. The compass in your smart phone isn’t accurate enough for this. I used my Casio Rangeman wristwatch and it worked perfectly.
Go to Dishpointer.com to find out WHERE to point. Enter your address or city and then look for 75.2 W GOES-16
Dishpointer.com (click to enlarge)

Note that my azimuth is 186.7 (mag N) degrees and elevation is 49.2 degrees. Now take a REAL compass like this one and aim the disk. DO NOT TRY TO USE THE COMPASS ON YOUR PHONE. To set the elevation of the antenna you can use a phone app. I use one called “Clinometer”. Heck at 49 degrees most everyone kinda knows what 45 degrees looks like roughly.
Now take your SDR and SDR software, I’m using SDR# here, and find the signal. Make sure the LNA has power by selecting the Bias T setting. NOTE: I’m using an Airspy device for this to make it easy to apply Bias T. Make sure NOT to mix the connections up (link here for proper hook up). Below is what the signal will look like. Big bump on the right is the HRIT signal we want.

Now that you have the signal you can start bumping the antenna around until it is visually the best it can be.
Okay this is half the battle. Now we want to decode. There are a couple of ways to do it. One is with a Windows computer and a program from USA-Satcom called XRIT. The link I provided is a contact form. You have to first contact the developer. His program is a pay program and he first wants you to email a screenshot of you receiving the signal.
NOTE: IF YOU USE XRIT YOU NEED A COMPUTER WITH SOME OOMPH. I tried it with an i3 with 4GB of RAM and there were issues with the buffer. The computer simply wasn’t fast enough. The developer recommended an i5 Quad Core.
The second way is with a Raspberry Pi. And I should stress this is all open source software (FREE). If Linux and the Raspberry Pi scare you or intimidate you the only option is the pay program above. Directions for doing this whole project, start to finish, to include Raspberry Pi setup are located here. I’m not going to repeat the steps here as the instructions are PERFECT.
I set my Pi up headless so there wasn’t a mess of keyboard, mouse, and monitor. I just SSH into it from a terminal on my Mac. Essentially you open two terminals and in one run this command:
goesrecv -v -i 1 -c ~/goesrecv.conf
It will look like this:
First Terminal GOES (click to enlarge)

Goose your antenna around until the vitt (avg) number is steadily below 400 and there are zero packets dropped.
In the other terminal run this command:
goesproc -c /usr/share/goestools/goesproc-goesr.conf -m packet --subscribe tcp://127.0.0.1:5004 --out /home/pi/goes
It will look like this.
2nd Terminal GOES (click to enlarge)

The number on the bottom will be scrolling indicating it is receiving data and it will read out files as it writes them to disk.
You can then take a program like CyberDuck or Filezilla and SFTP into your Pi so you can view the files as they are downloaded. What I’m trying to show is the Vit Avg needs to be less than 400 (mine are in the 200’s) and the dropped packets needs to be zero. Then you see activity in the other terminal which is downloading and writing the images to a folder on your Pi.
And this is literally the first image that downloaded. Hurricane Dorian.

Finally you can download enhanced images and makes gifs from them. Happy GOES hunting!


John,
I have enjoyed reading your info first on INMARSAT,and now GOES.
I’ve had success on INMARSAT first with a patch antenna and now with a permanent install where I am using a yagi originally intended for cell phone reception. I’m sure that GOES will soon follow and it’s nice that someone has already gone through the frustrations associated with these projects so others,like myself,won’t have to. You are much appreciated!
Many thanks,
Doug
AA0DW
Thank you Doug. I am the writer of none of these projects but I just try to consolidate information into easy to follow steps and put it in one place. So many times I’ll be working on something and you have to get information from several places or someone leaves out a key step or three. In many cases I just gather the information so that when I have to re-do my projects at least I know all the info will be on my server and not deleted or something.
John
KN4FMV
John,
My system is finally up and running. I utilized some of the old parts (mainly dish and LNA) connected to the Pi3. The images are rather impressive.
My question: Is there a way to automatically crop the full disk image to, say, create an image of the CONUS?
Thanks in advance,
Don
Monroe, LA
KD5MWL