
I have a LiftMaster garage door opener in my home. Newer garage doors implement something called Security 2.0 which means the remote and receiver on the opener have a rolling (changing) code between them.
So essentially that means you can’t just trigger the opener by adding a wifi controlled relay to make the door smart. What you have to do is to buy a My Q Smart Garage Hub which used to cost bigger bucks but now comes in around $80. There is a subscription service you can buy to integrate into your home automation. Otherwise it only works with a phone app. Also, do you REALLY want your garage door state published to someone else’s Cloud?
In order to have a wifi controlled garage door or an MQTT controlled garage door (machine to machine protocol) you’ll have to cheat. Here’s what you need to pull this off:
- Spare remote with Security 2.0
- Inching relay such as Sonoff 4 Channel Pro
- Some ethernet conductor wire
I opted for this device, the Chamberlain KLIK3U-BK2

I was able to get it at my local Wax-Mart for $30. Pairing it was a piece of cake as the box said it works with all LiftMaster, Craftsman, and Chamberlain door openers.
Those are all essentially exactly the same devices, just rebranded.
It was very easy to pair. You just slip the battery door off and inside is a programming button. Push it, then click the button you want to program, then on the garage door there is also a “Learning Button”. Push it and the push the button on the remote the number of times a chart in the manual tells you then press the remote programming button to save it all.
Mine worked instantly. So now you pretend it is Johnny Five and disassemble it. (I know some of you won’t get that joke).
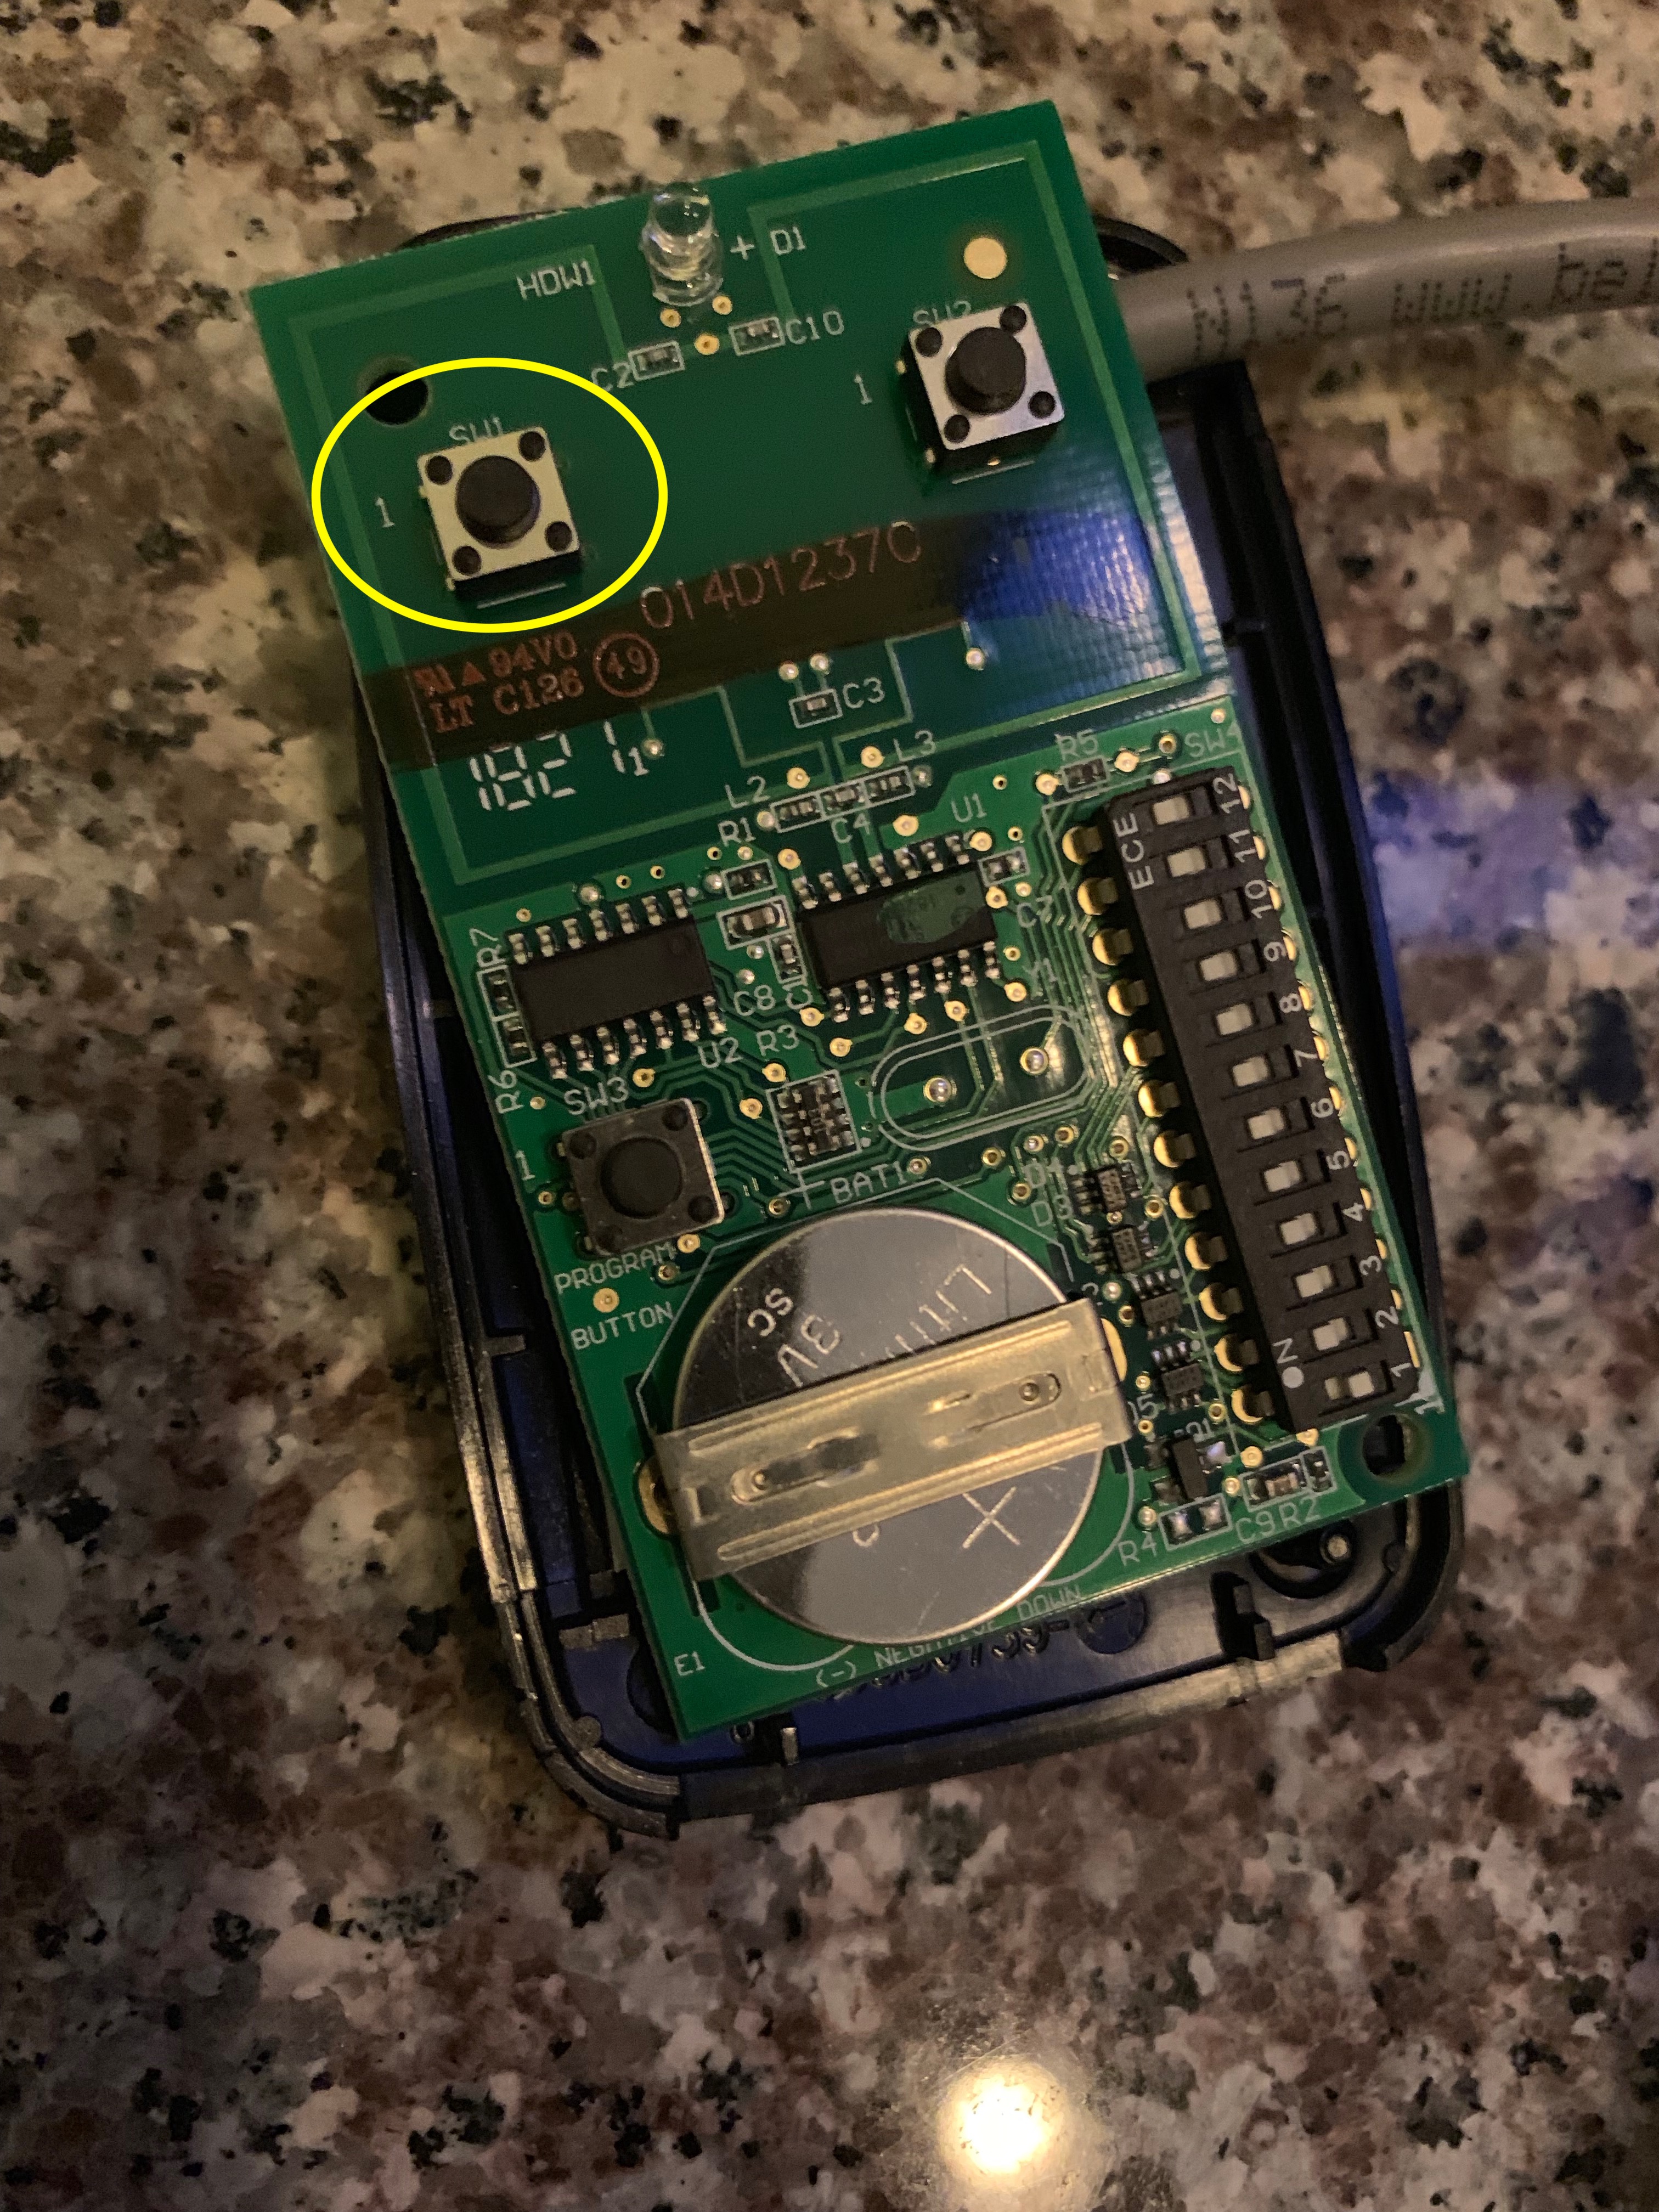
I used the SW1 switch on the left side of the controller and that’s where we need to apply our soldering foo to. First let’s see which side of the switch SIMULATES a button push. Take a short hunk of wire and strip both ends. Then go on one side of the switch and short the contacts. If your garage door goes up………….you da man.
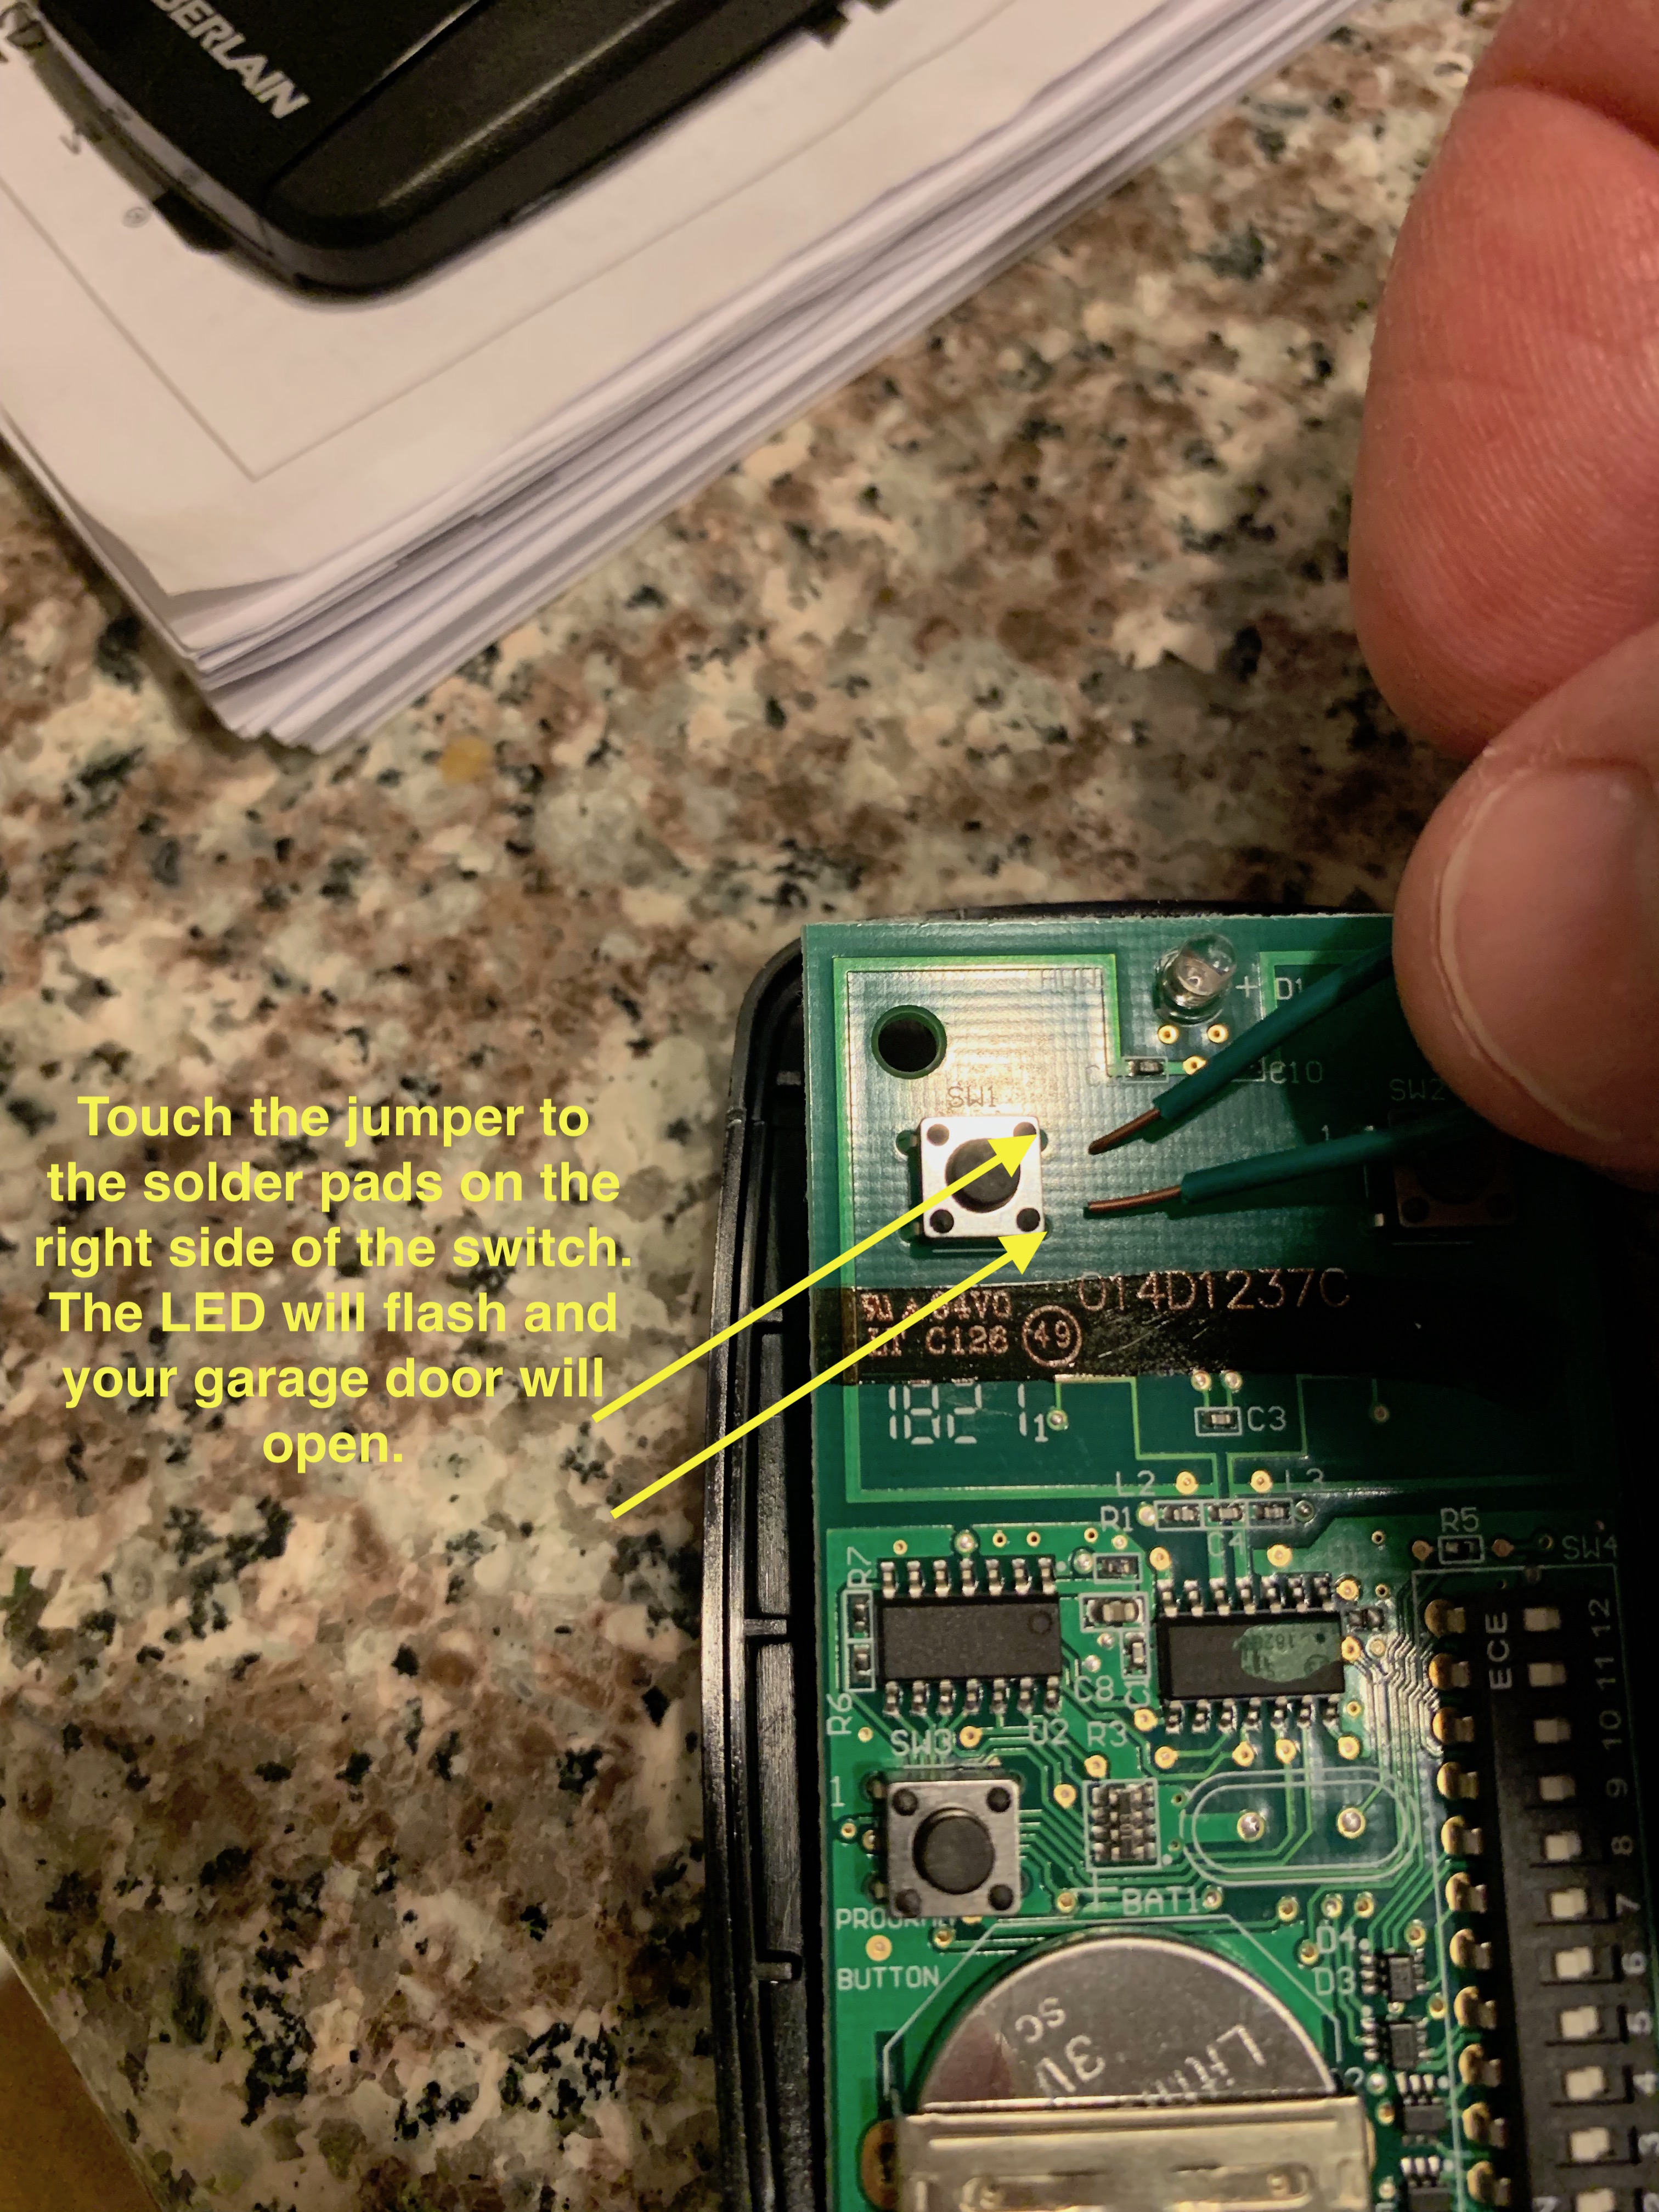
Nothing to it. Now it is time to solder two small wires to the backside of the switch. The perfect wire for this is CAT 5 ethernet cable. What we want to do is just hook two loose wires to the backside of that switch like so:
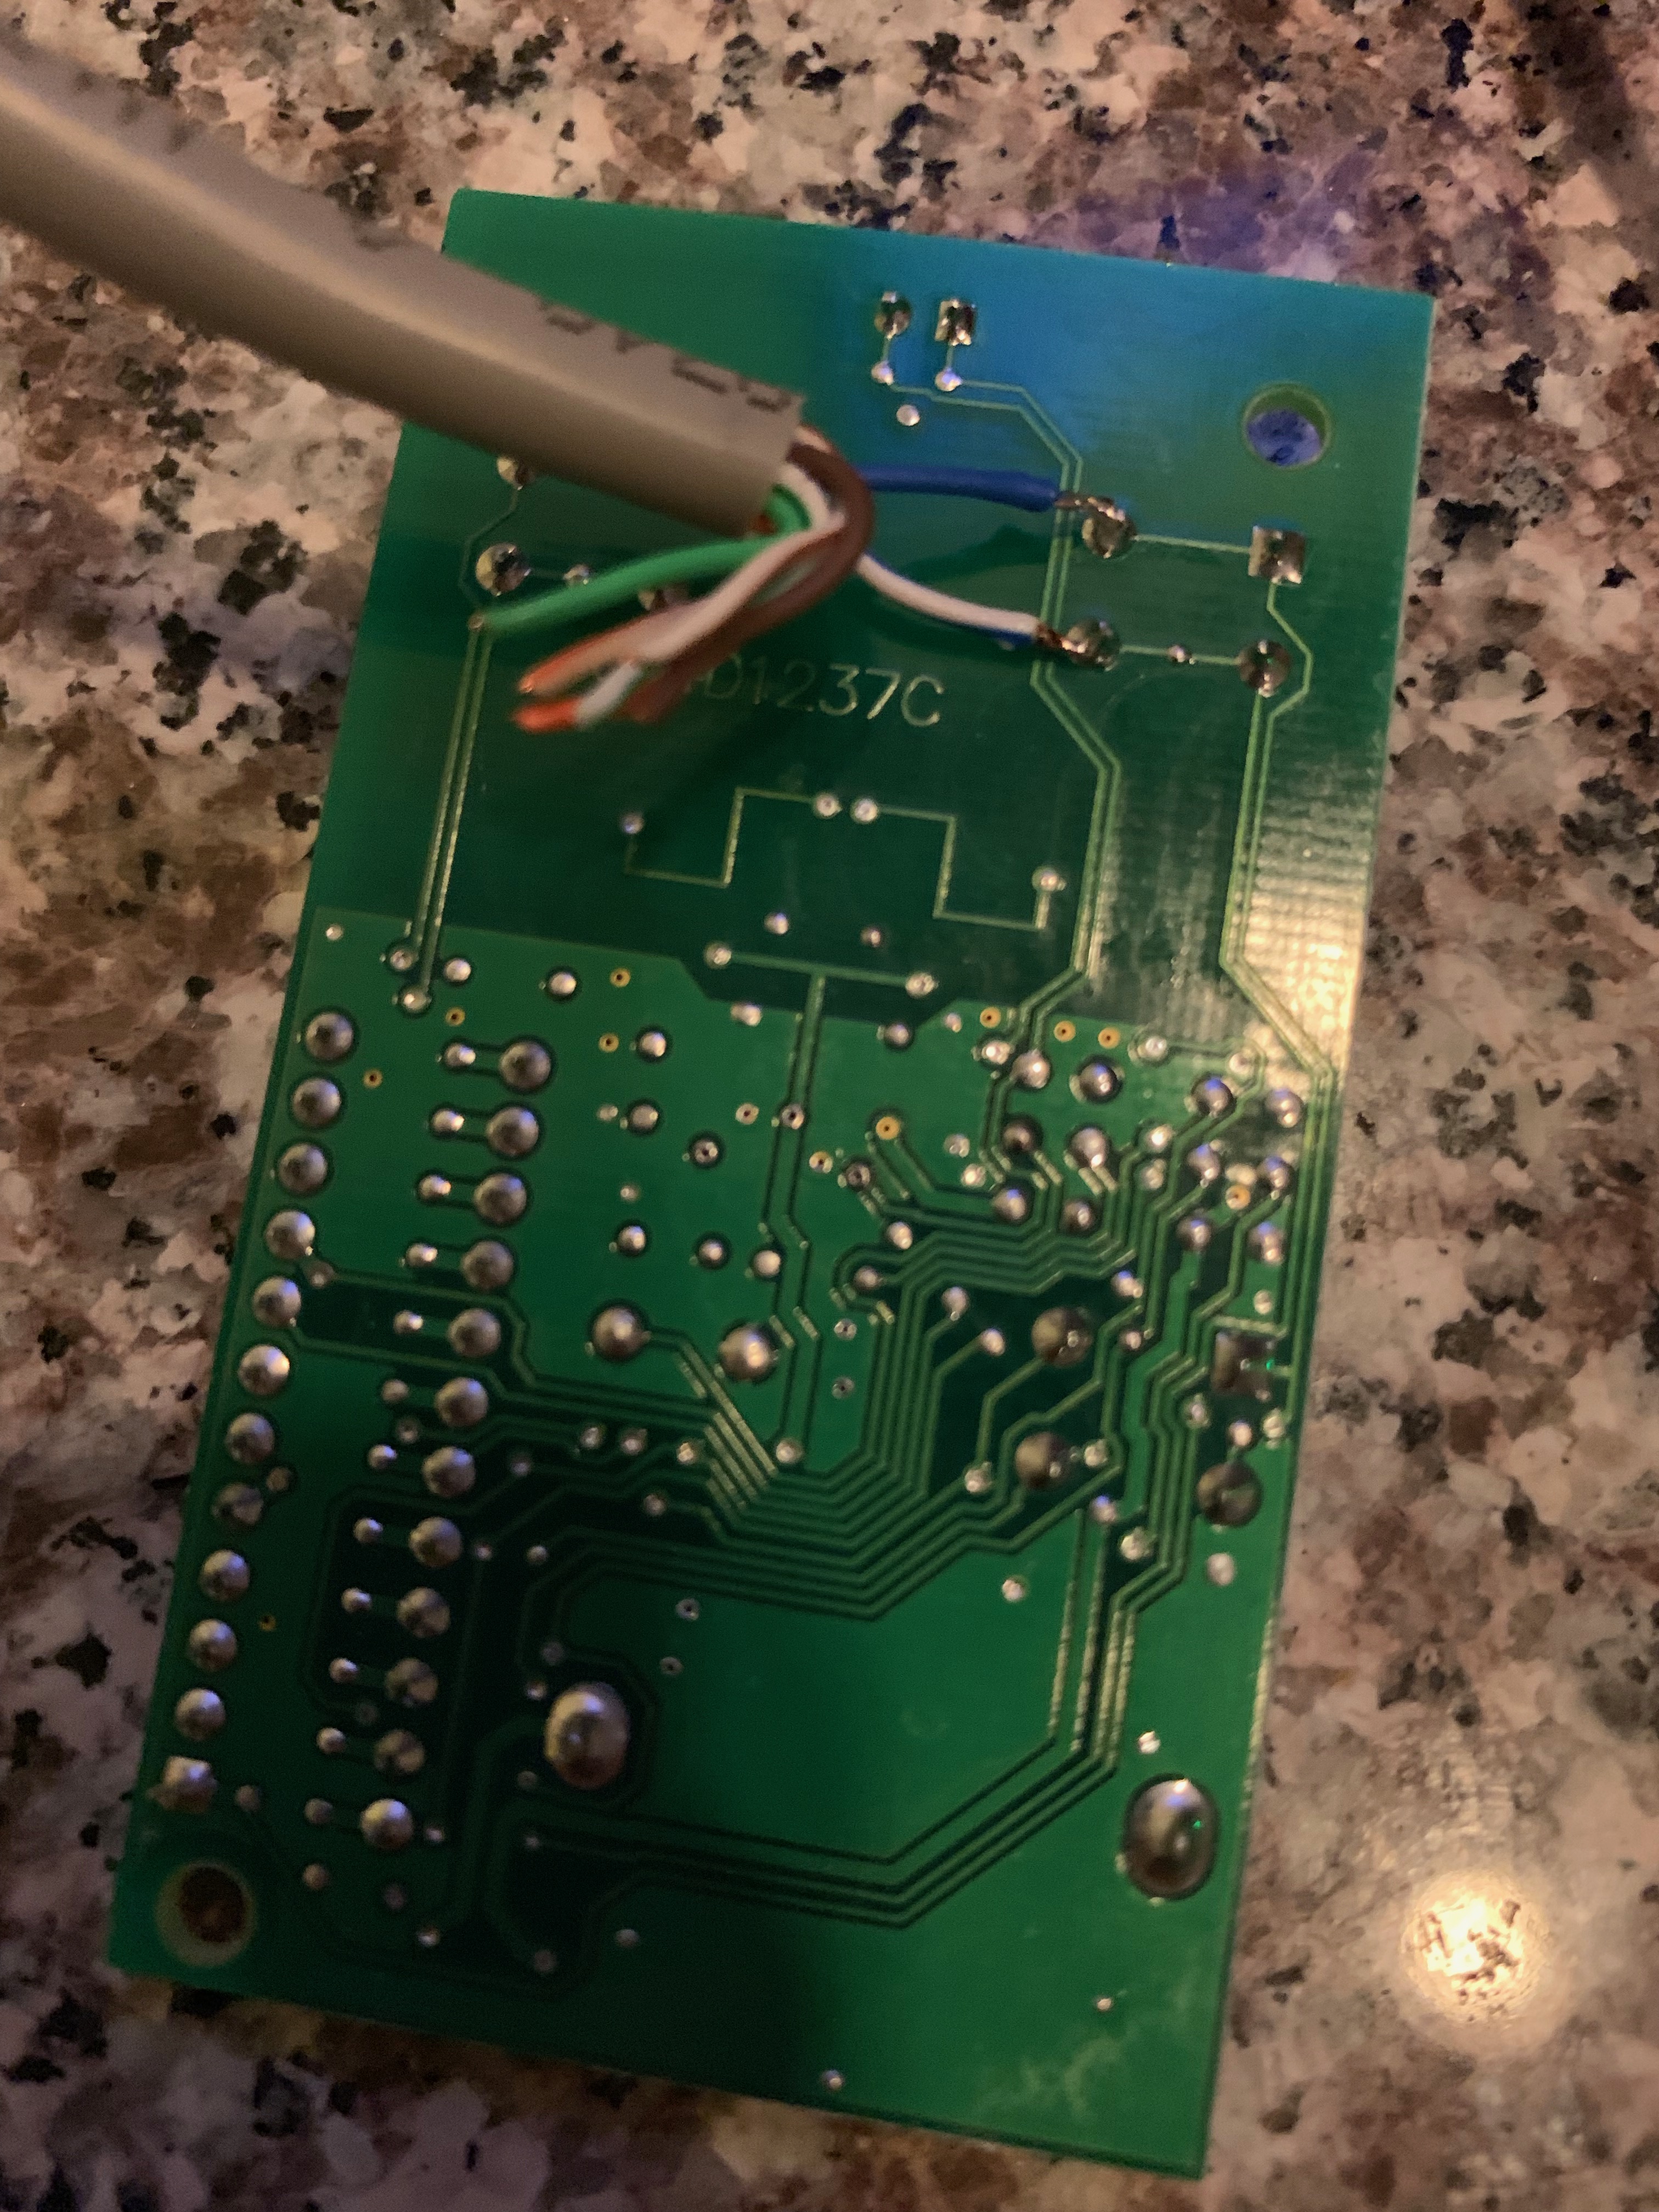
Now you’ll connect the other end of this to a WiFi or MQTT controlled relay. Make sure to use these two contacts:
- NO = Normally Open
- COM = Common
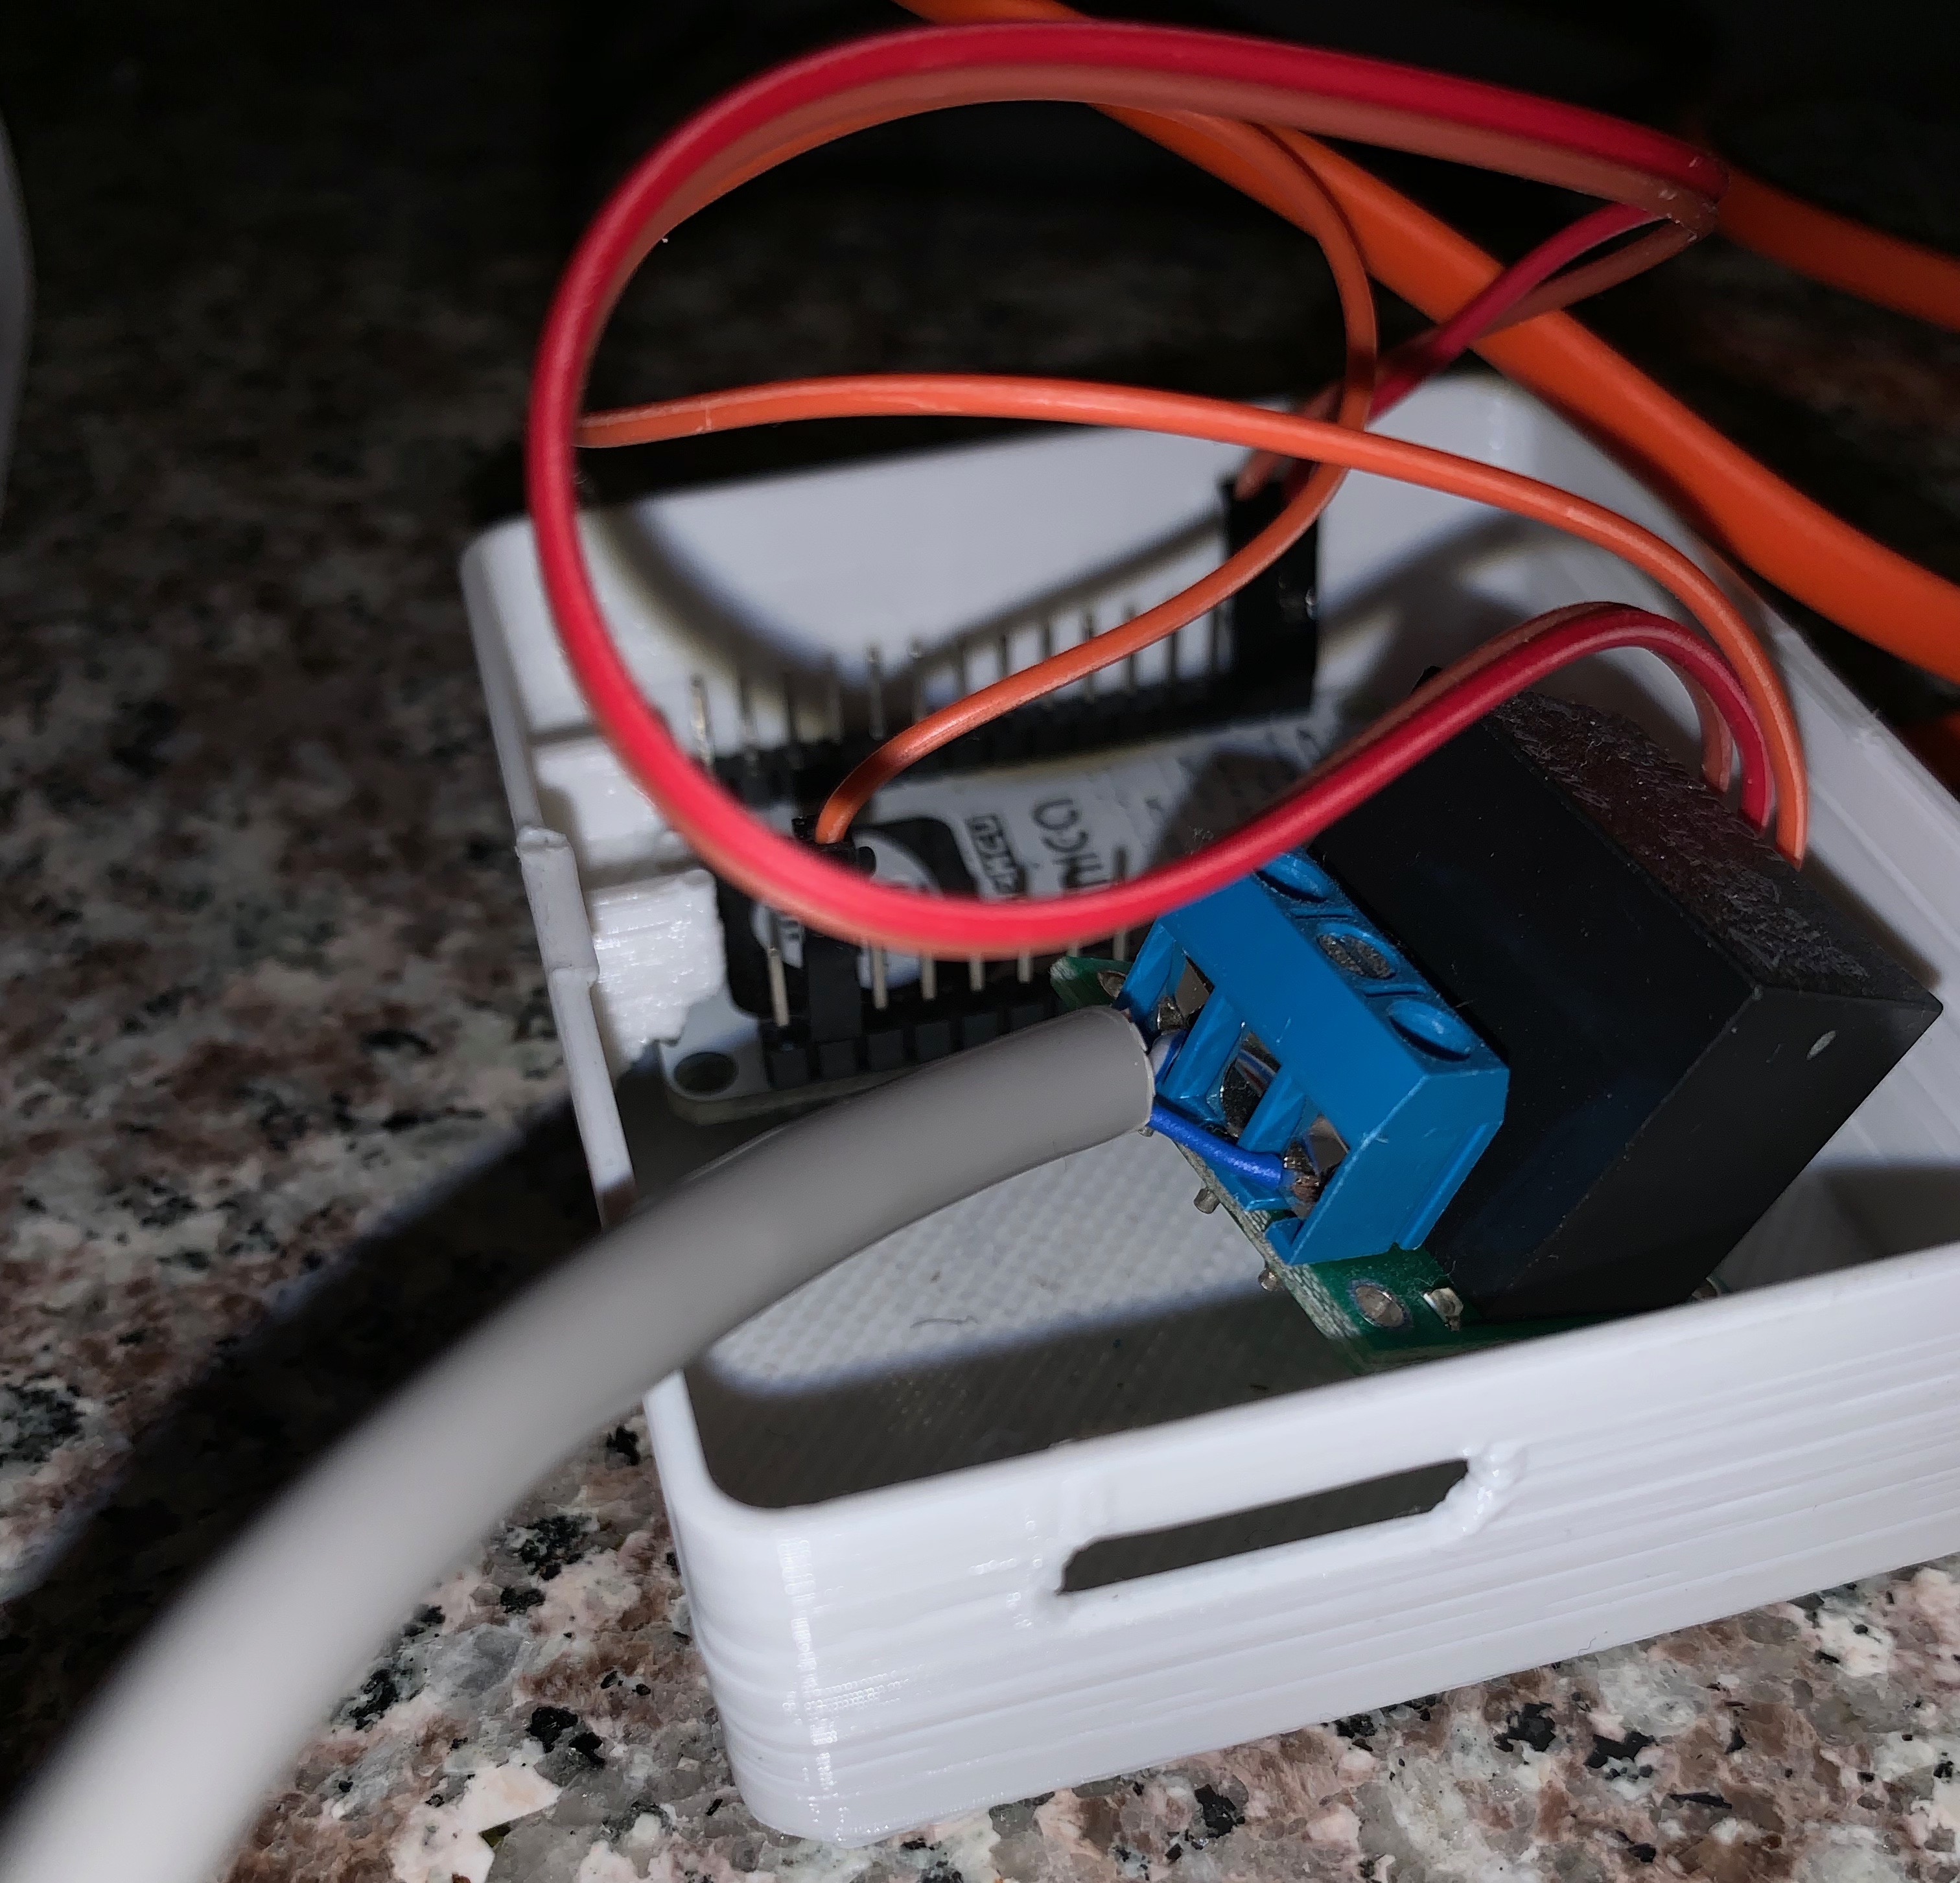
Now you can test it. The rig I have above is a NodeMCU, ESP8266 and a Songle 1 Channel Relay. I have some Arduino code on it to simply open and close the relay over MQTT.
NOTE THAT THIS IS NOT AN INCHING RELAY AND THE STATE OF THE RELAY IS EITHER ON OR OFF. THIS CONDITION IS NOT PRACTICAL AND WAS ONLY DONE FOR TESTING FOR PROOF OF CONCEPT.
Let’s give it a go, shall we?
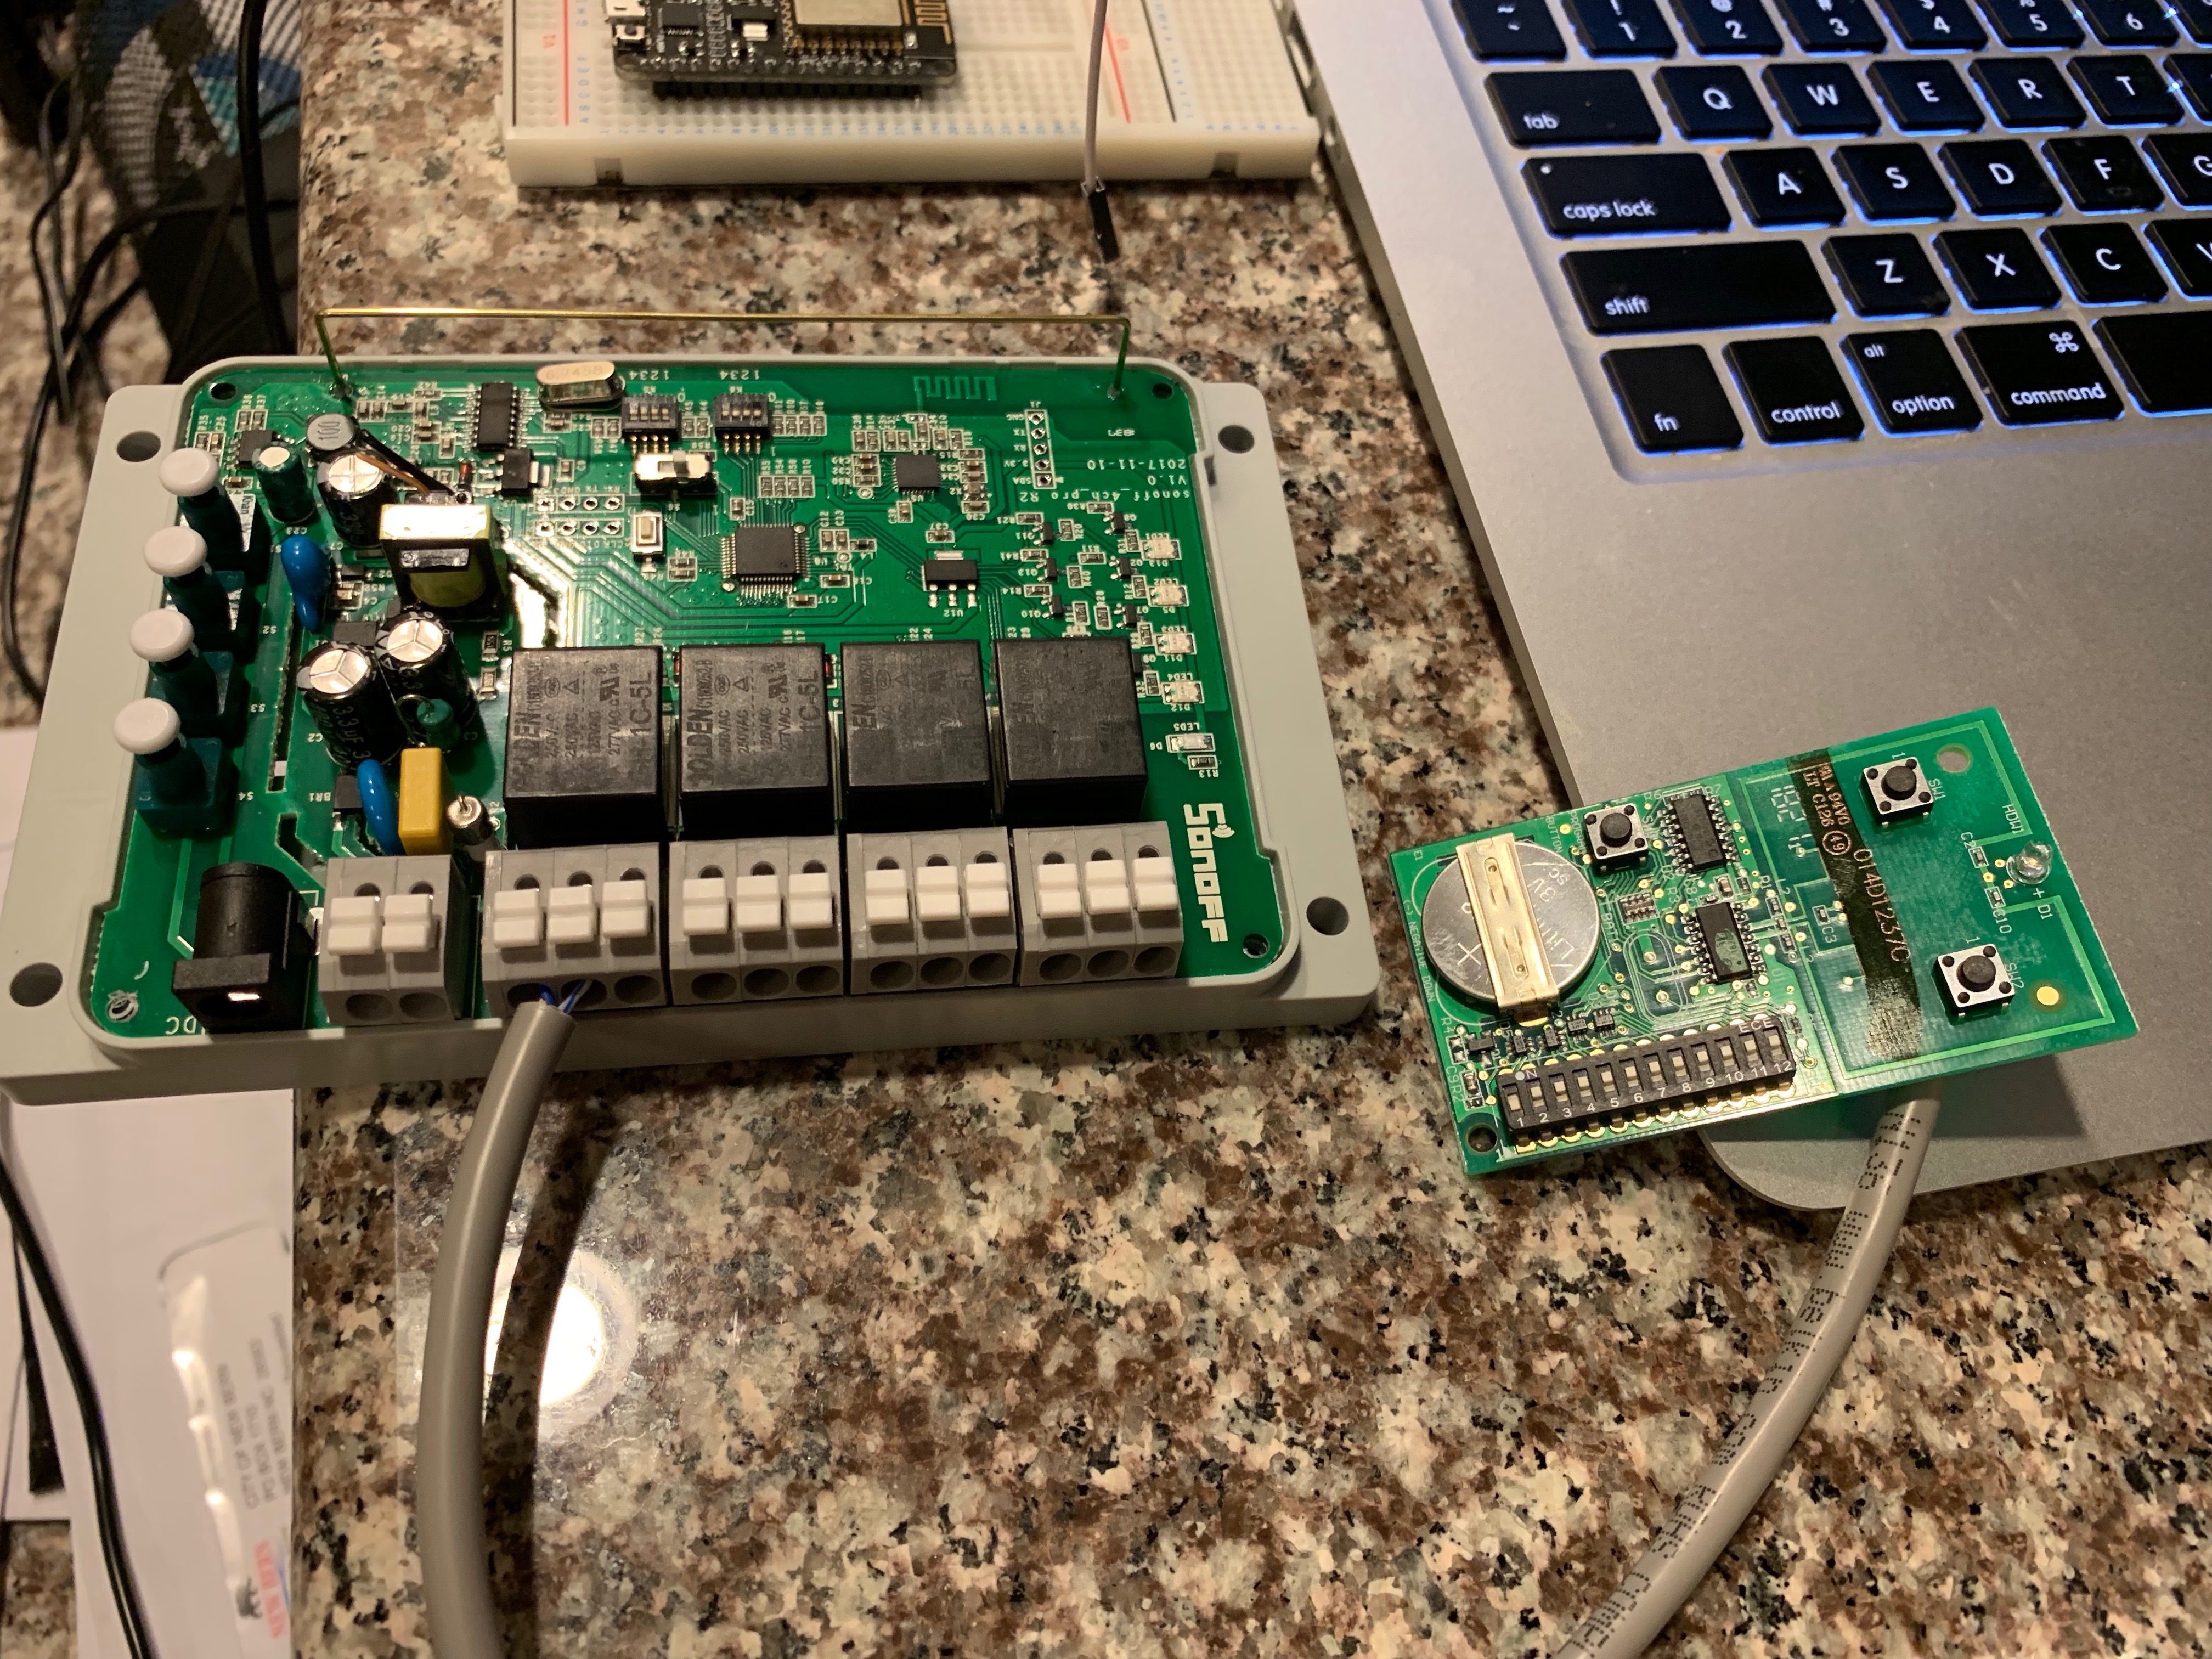
WOW! It worked! Time to move to the proper relay. This is a Sonoff 4 Channel Pro which will be perfect for what we are doing. When you get the relay you can use it with the stock firmware but I was not a fan of the stock firmware at all after using it for a day and decided to flash the device with Tasmota Firmware. . Here’s an excellent YouTube video on how to do that.
I want to stress something here. Once you get your garage relay set up you should kill the power to it and power it back up and you should also kill the wifi network and bring it back up and if you are using MQTT, kill that and bring it back up as well. YOU DO NOT WANT ACCIDENTAL ACTIVATIONS OF YOUR DOOR!
When you get the relay the first thing you want to do is flip some DIP switches to allow the relay to perform inching mode and to set the timing of the momentary on/off pulse.
4chpro Board Settings (click to enlarge)


Okay now you can hook up your garage door opener to the 1st relay. Hook to the terminals labelled NO and COM (Normally Open and Common).
You are ready to test. Here’s a quick video of my first run through.
The relay will either be connected to Wifi by the Ewelink iPhone app or via your Tasmota firmware upload. I have Tasmota. You can navigate to your relay settings by going to the IP address of the relay. You may have to find it in your router settings or by using an app like Fing or similar.
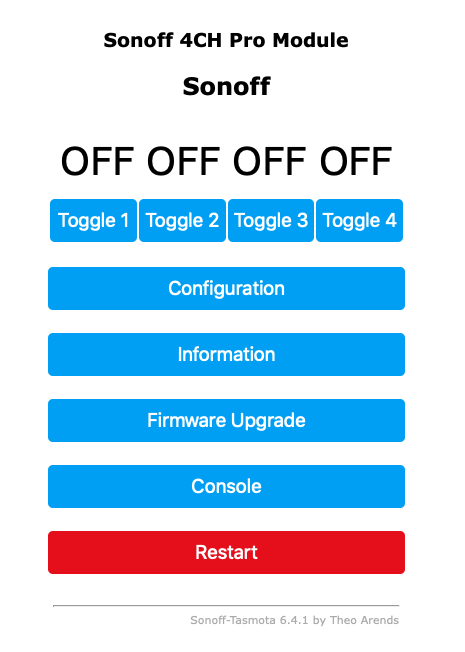
From here you can hit “Toggle 1” to open your garage door. This is the Tasmota page. The original firmware page is different. Again I didn’t like the original firmware.
Also from here you can go to the Configuration button and configure your MQTT server.
Once MQTT is set up you can issue commands and incorporate this into your home automation software. I use something called HomeAssistant.
Here’s how I set up HomeAssistant. First add a new switch.
switch 15:
  - platform: mqtt
    name: "Garage Door"
    state_topic: "stat/sonoff4chpro/POWER1"
    command_topic: "cmnd/sonoff4chpro/POWER1"
    payload_on: "ON"
    payload_off: "OFF"
    optimistic: false
    qos: 0
    retain: false
Now it will show up as the following entity:
switch.garage_door
Add the switch to your panel and activating it will cause it to energize for 1 second and open the garage door. The switch in Home Assistant will set back to the off position . There are ways to add push buttons and stuff in Home Assistant but I’m not there yet.
For maximum effect add this to the customize area of HomeAssistant
    switch.garage_door:
      friendly_name: Garage Door
      icon: mdi:garage
Now, this is all well and good but from afar you don’t really know if your garage door is open or not. Just because you hit this switch you don’t know if it is going up or down. So now we should add a sensor to the door to determine the door state. There are of course several ways to slay this dragon but in my mind the only state I REALLY care about it is Closed. Closed is safe, and if it ain’t Closed it must be open. I don’t care how far open……….I care about the closed state the most.
I decided to do this with an ESP8266 device and a reed switch. A reed switch is a magnetic proximity switch. If the magnet is over the sensor that means the state is CLOSED.
So you hook one end of the switch to the D6 pin on the ESP8266 and the other end to ground. And then mount the sensor on the door frame or wall. Place the magnet on the door to where the two line up when the door is closed. When the door goes up and the magnet moves away the ESP8266 will send the OPEN signal.
Oh, and by the way I am using Homie firmware and the example sketch for a door sensor here. Homie is kinda sorta complicated and I’m not getting into that here.
Here’s how I did that in HomeAssistant. First add a binary sensor.
  - platform: mqtt
    name: Garage Door
    state_topic: homie/sonoffa020a615d07d/door/open
    payload_on: 'true'
    payload_off: 'false'
    sensor_class: 'opening'
    optimistic: false
    qos: 0
    retain: true
Now add an automation to report the door state.
automation 24:
  alias: Notify when garage door opens
  trigger:
    - platform: state
      entity_id: binary_sensor.garage_door
      to: 'on'
  action:
    - service: notify.mypushbullet
      data_template:
        title: "Garage Door Open"
        message: >-
          Doors Open Dude
Then I made a group card and placed the switch and sensor in.
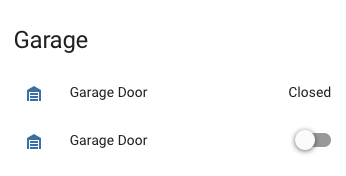
Wow! Both of these turn yellow as well when operating. And the little icon changes as well. And coupled with the automation above you get a notification sent to your smartphone when the door is open.
Now lets talk about other automations.
You could obviously have a notification sent when the door was closed too. Now how about this one. Lets say you leave for work and push your clicker and the door starts going down. Then for whatever reason it goes up because it didn’t make the full travel. My door does that when it is too hot or cold. We can automate the door closing after 15 minutes or 30 minutes or whatever.
Also you could include a proximity automation where when your smartphone got within 50 yards of the house the door would open. There is no limit really to what you can automate with HomeAssistant.
Here’s a video of how the garage door sensor works.
And here’s a video of the screenshot of the HomeAssistant interface as the door runs up and down.
And lastly I set an automation to close the garage door after 20 minutes of being up.
automation 25:
  alias: Close Garage After 20 Minutes
  trigger:
    - platform: state
      entity_id: binary_sensor.garage_door
      to: 'on'
      for:
        minutes: 20
  action:
    - service: switch.turn_on
      entity_id: switch.garage_door
And Bob is still your uncle.
This is a clever solution and I’m glad it’s working for you.
I think you could have saved yourself some time by getting a Linear GD00Z z-wave garage door opener… It wouldn’t have been as fun as building this, though! 😉